Plugin for Android Studio
An Overview
pCloudy has released a plugin for Android Studio which provides you access to the platform for performing manual and automation testing of mobile apps from within Android Studio IDE.
For Manual Testing
Now you can build and upload your Android Apps to pCloudy devices directly from your Android Studio project workspace.
For Automation Testing
If you are using Appium as automation tool and have created your Automation scripts as a project in Android Studio, you can run the scripts directly on pCloudy devices.
Prerequisites
1. An account in pCloudy with enough credits.
2. An API Access key for authentication with pCloudy.com
3. Chrome Browser on local machine
4. Android Studio IDE
5. Android Studio pCloudy plugin
Preparation
Reference the JAR files to Eclipse
Make a note the API Username and API Access Key
How to Install the Plugin
1. Download the Android Studio plugin for pCloudy
2. Open your Android Studio > go to Setting icon of Android Studio > Select Plugins > All available plugins are shown which can be filtered with the help of Show feature as per requirement.
3. Click on Install plugin from disk > Browse and select location of your downloaded Android Studio plugin of pCloudy
4. Click on OK
5. Now, you can see that pCloudy plugin has been successfully integrated to Android Studio.
Select pcloudy plugin and click on OK to proceed. Here, we are going to install pCloudy plugin for Android Studio from local disk. Click on Install plugin from disk
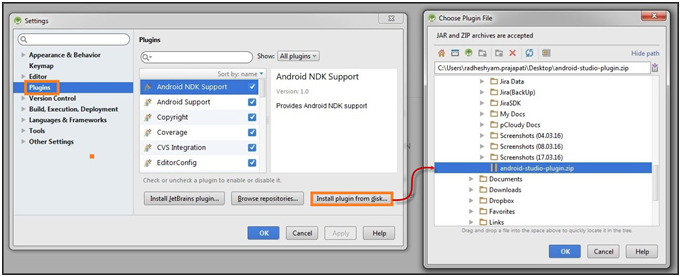
pCloudy plugin for Android Studio has been integrated successfully.
pcloudy-plugin-over-android-studio
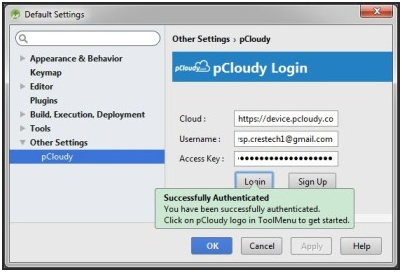
Click on pCloudy plugin icon shown on Android Studio. pCloudy Login page opens. Enter your Username and Access Key and click on Login. Your login credentials are verified. Click on OK to proceed.

Note: This is one-time task. Credentials will be valid until you logout.
Now, you are ready to use the Android Studio Plugin for pCloudy.
Manual Functional Testing of App
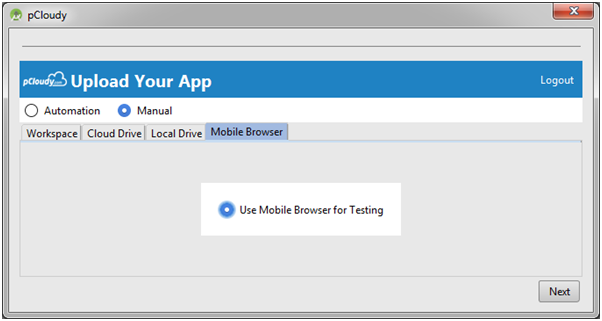
After successful login, upload your app screen appears. Workspace page helps you to select application path of your local machine.
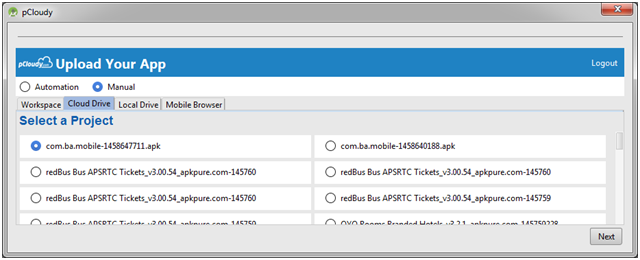
Cloud Drive page lets you to select app from the list and click on Next to proceed.
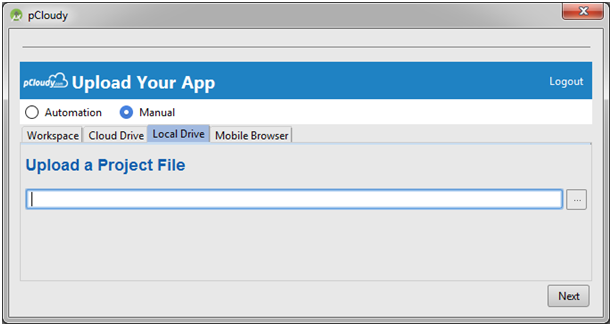
Local Drive lets you to upload your app from your local machine to perform testing.
Mobile Browser enables you to use mobile browser for testing.
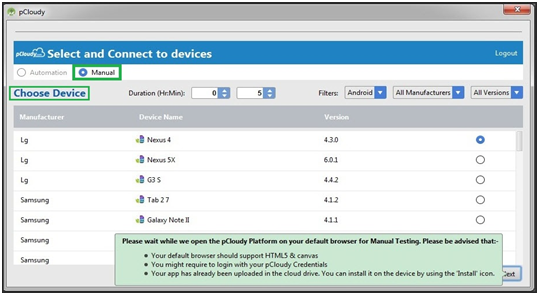
After selecting app, the next step is choosing a device. Select and Connect to devices page provides you list of devices which can be filtered by using filter parameters (Android/iOS, Manufacturer, and OS version). Select duration of your testing. The device will get booked for selected time duration.
When you click on Next, you get a message “Please wait while we open the pCloudy Platform on your default browser for Manual Testing. Please advised that…”
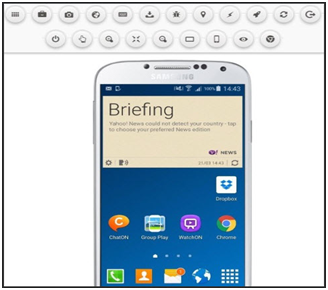
Just after few seconds, you will be redirected to the connected device page over pCloudy to perform manual functional testing of your app on selected device.
Automation Testing of App
Similarly, the first step towards performing automation testing is selecting an app from workspace/cloud drive/local drive or use mobile browser.
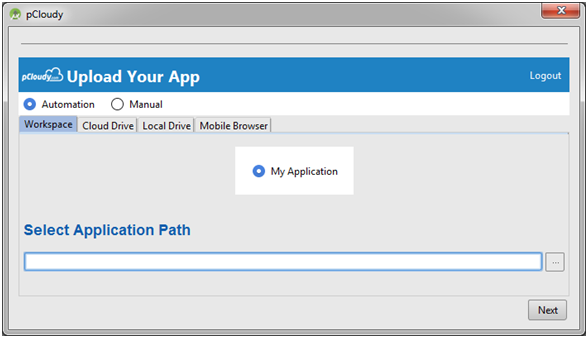
Select your desired device; select duration of automation testing. You can filter devices displaying devices by using filter options (Android/iOS, Manufacturer, and OS version). Click onNext to proceed.
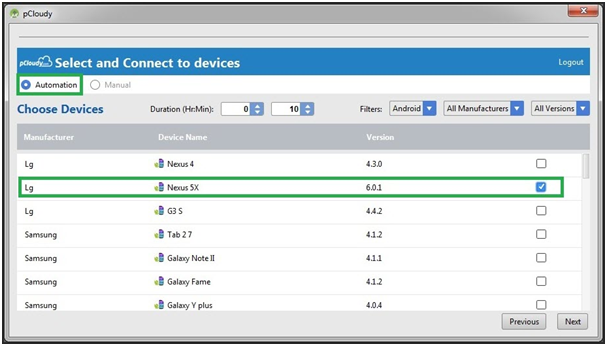
Note: Here, you can select multiple devices as well.
Finally, you get corresponding pseudo code for performing Automation testing of app. You can copy this pseudo code to clipboard and use it within your Automation script…
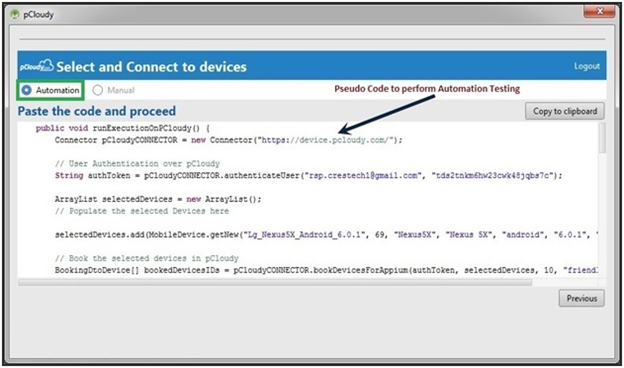
You will need the pCloudy java connector jar file for the above code to work. The pCloudy-java-conector.jar contains the API wrappers, classes & methods to use the pCloudy RestfulAPIs (without knowing how to call rest webservices from java). The gson.jar is a well known, opensource google library. You should add the pCloudy-java-connector.jar in its build path as a reference within your java project containing appium scripts.

 January 24, 2025
 January 17, 2025