- 04 Feb 2024
- 2 Minutes to read
- Print
- DarkLight
Schedule a Test Suite
- Updated on 04 Feb 2024
- 2 Minutes to read
- Print
- DarkLight
A test suite serves as a repository for various test cases designed to evaluate specific functionalities or behaviors of software.
For example, imagine a test suite created to assess the product purchase process on an e-commerce web application. It can include the following test cases:
Login (Test Case 1): Validate the login functionality to ensure users can access their accounts securely.
Adding Products (Test Case 2): Confirm that products can be successfully added to the shopping cart and appear correctly.
Checkout (Test Case 3): Verify the checkout process, including payment, order summary, and shipping details, to ensure a seamless transaction.
Logout (Test Case 4): Ensure that users can successfully log out of their accounts, guaranteeing proper account security and session termination.
pCloudy users can now schedule their Test Suites execution for a particular date & time.
Let's understand how to schedule a test suite to run at a particular date and time.
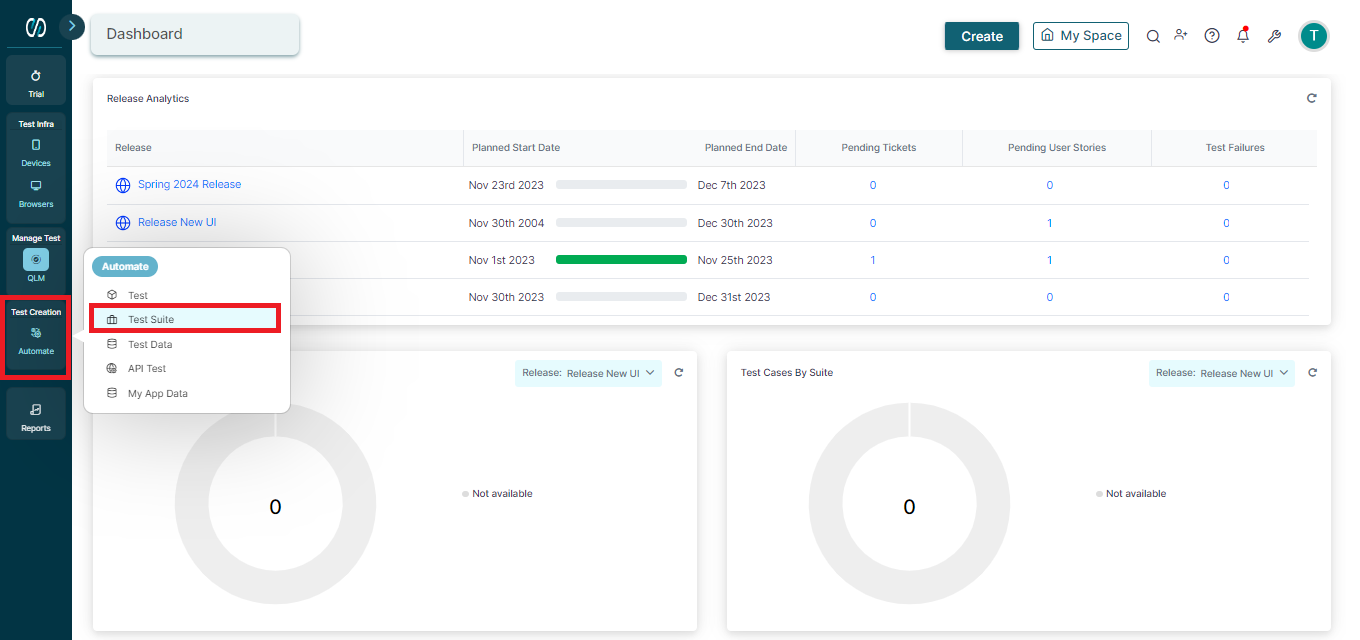
Hover over the 'Automate' icon on the left panel and click 'Test Suite'.
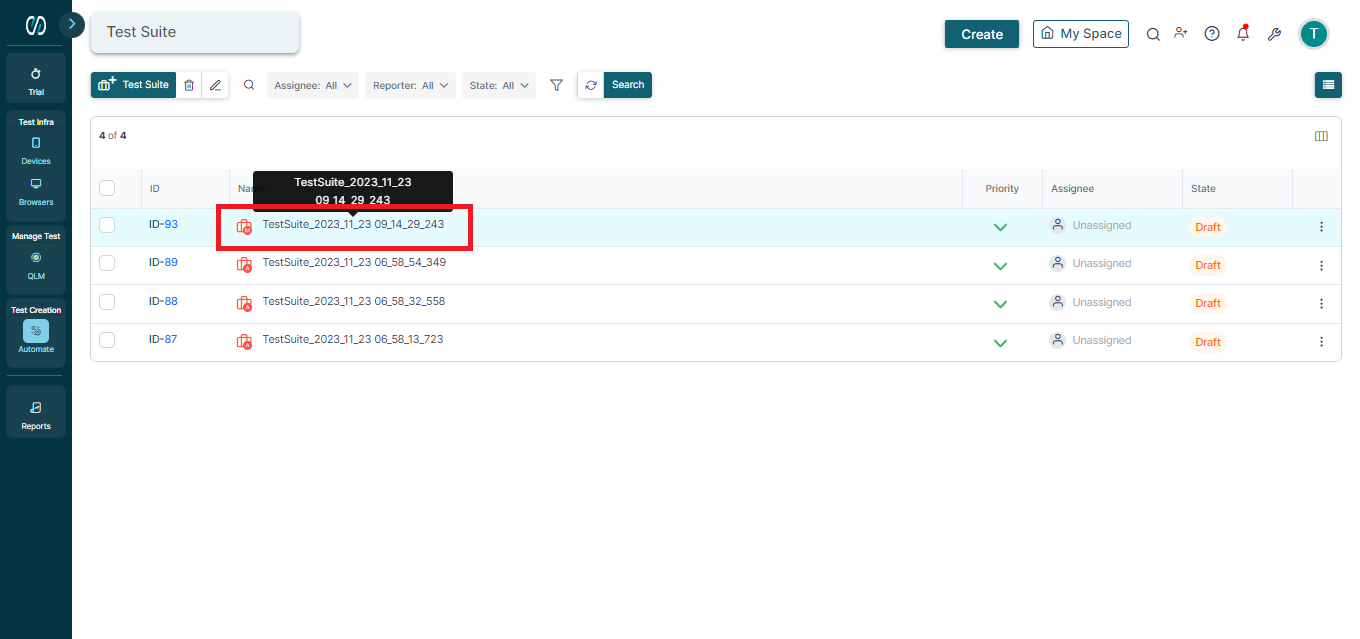
The test suite dashboard appears. Here, you can see the already created test suites in pCloudy. Double-click on a test suite to open it.
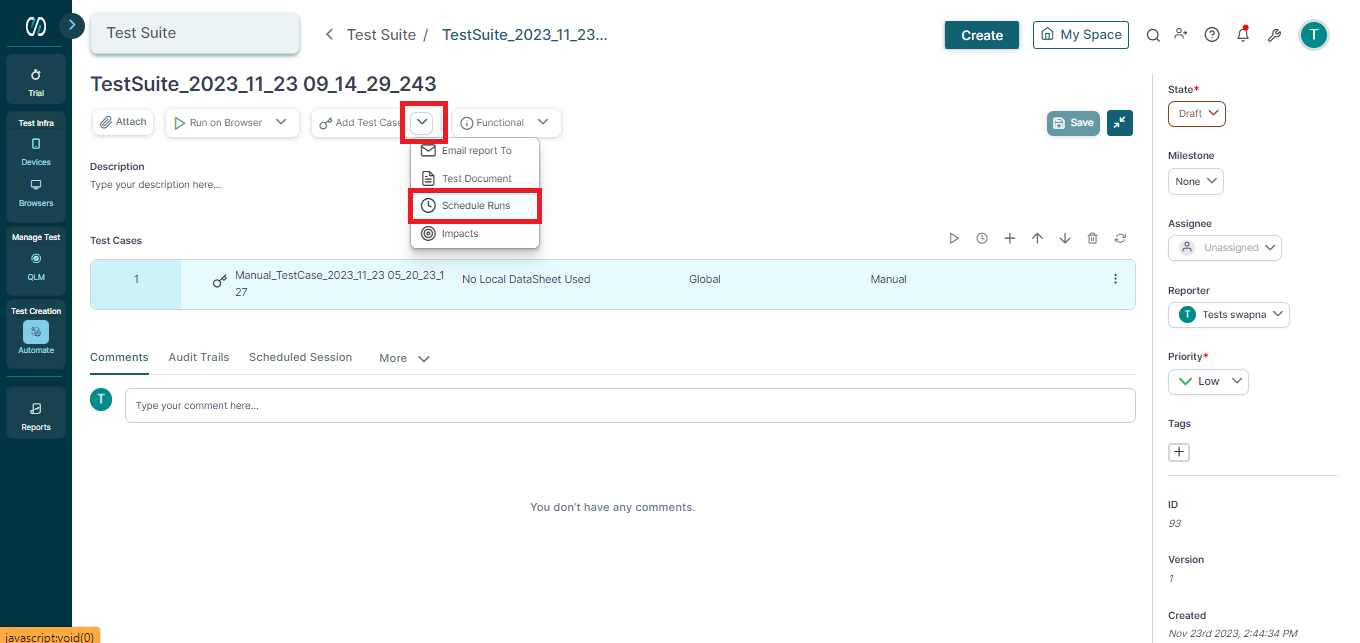
At the top of the test suite page, click the dropdown icon on the Run button and select Scheduled Run.
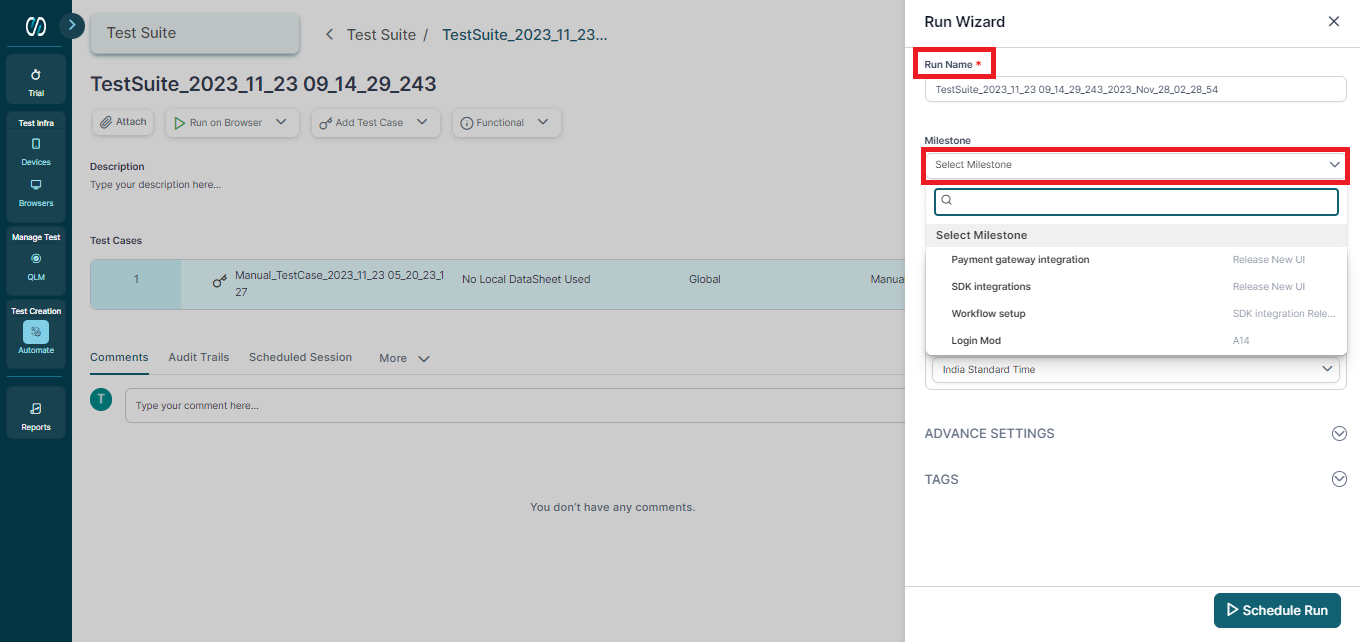
Enter the name of the ‘Scheduled test suite’, and select ‘Milestone’.
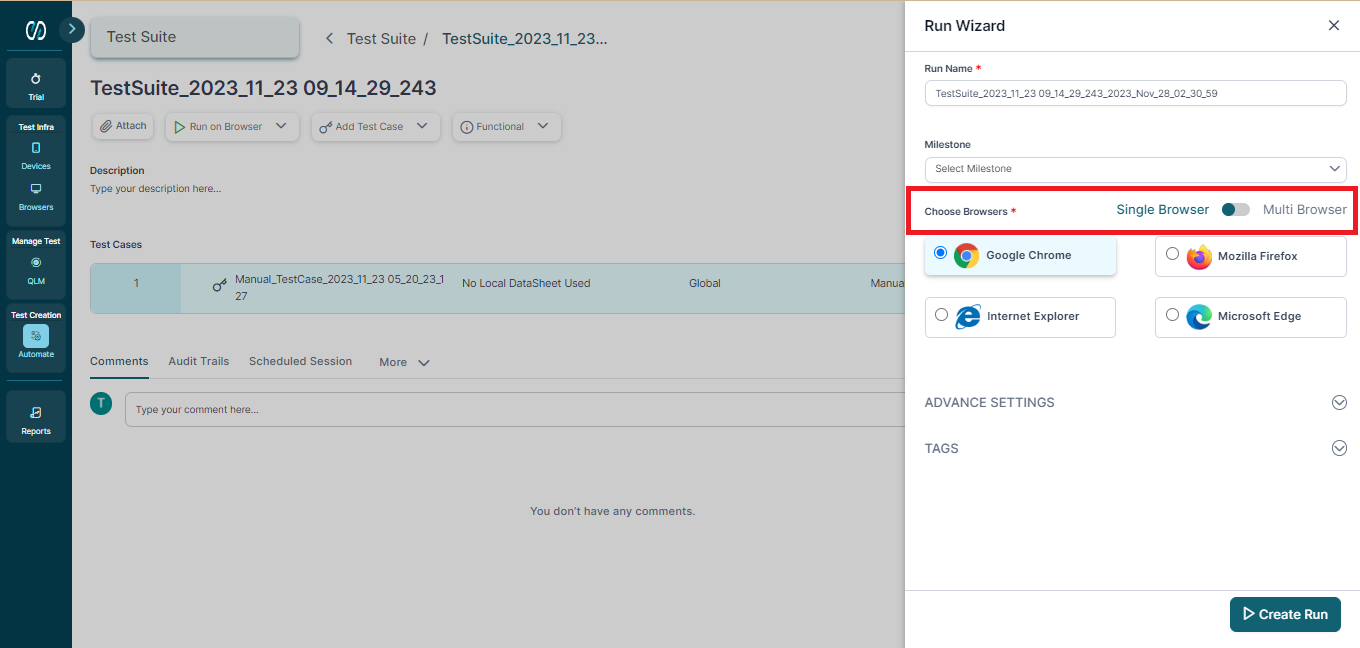
Scroll down and select the browser testing mode with the toggle button. By default, the Multibroswer testing mode is selected. You can select either single or Multibrowser testing mode and choose the browser/s to run the test suite.
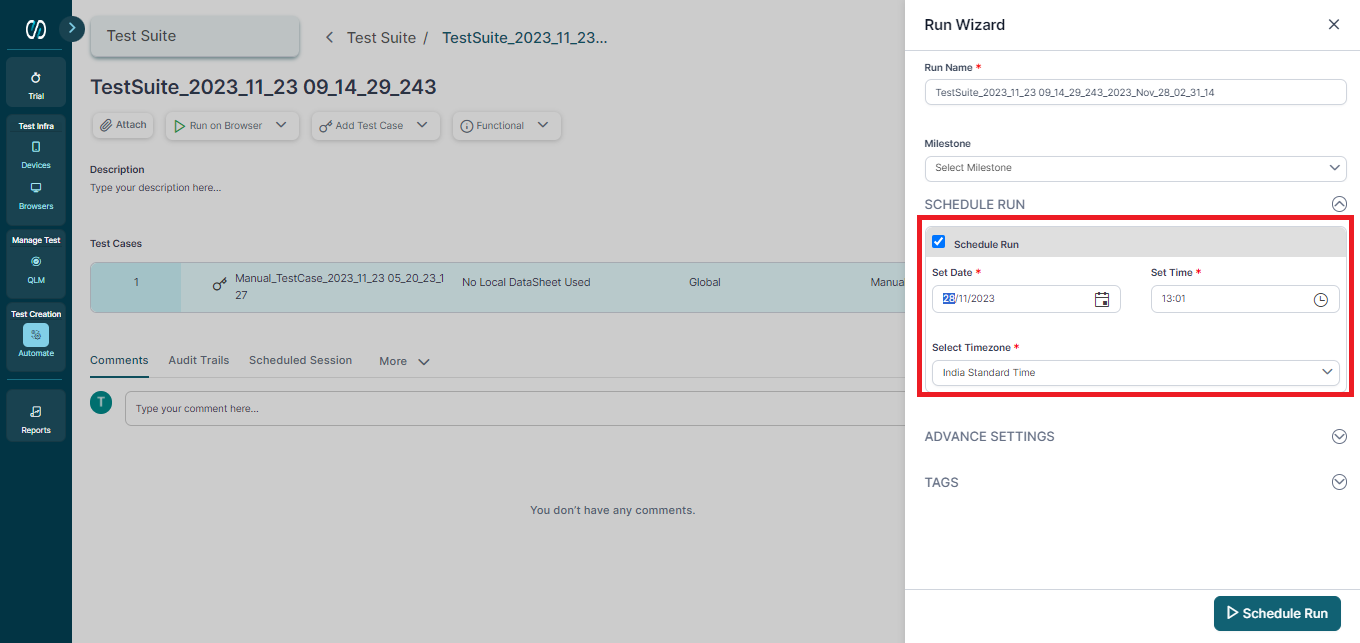
Scroll down further and go to the Schedule Run section. Choose the date, time, and time zone for the scheduled run.
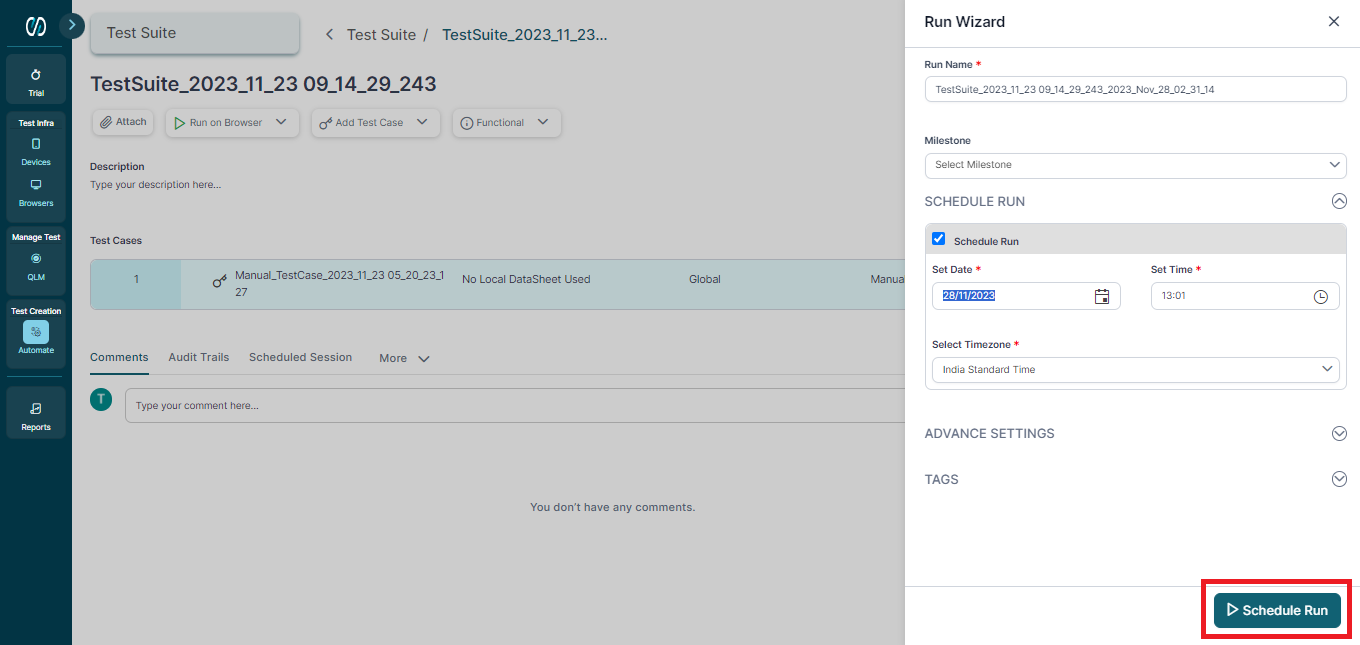
Click on the Schedule Run button at the bottom to schedule the test suite run.
Note: The run will get triggered at the selected time and will be executed. You can schedule single & multiple Suites from the Run.
You can also view and reschedule the test suite execution.
Click the Tool icon on the top-right corner.
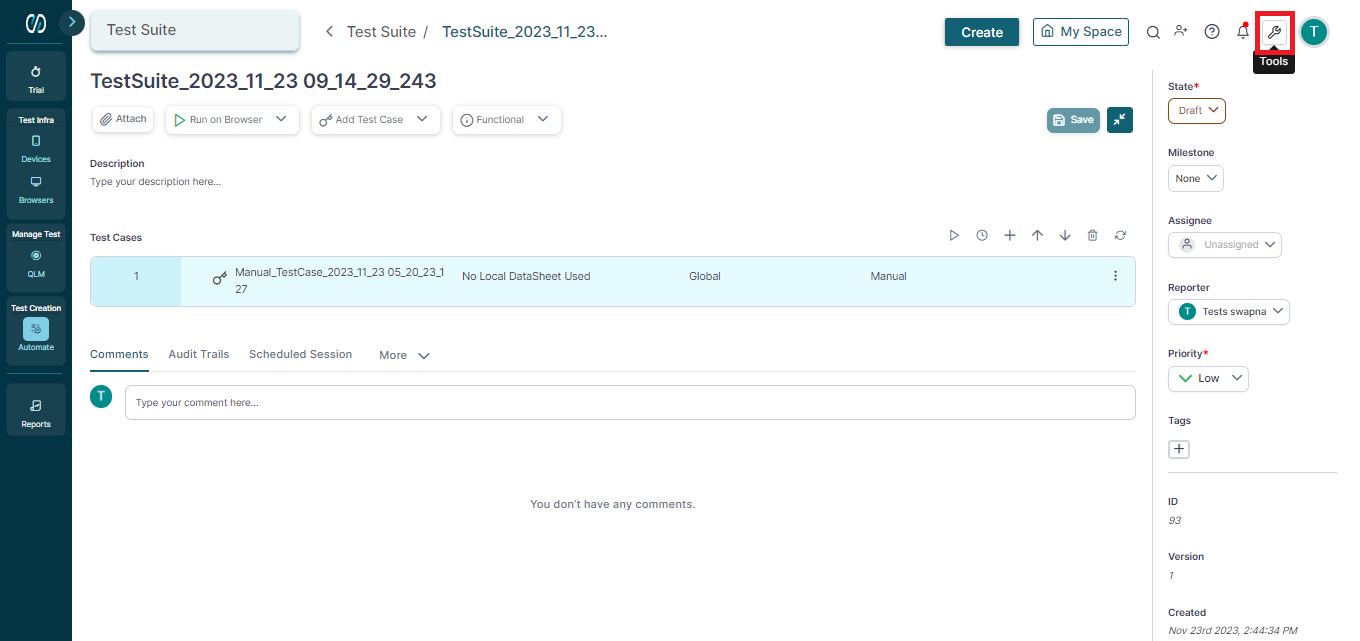
Click the Scheduled Runs option.
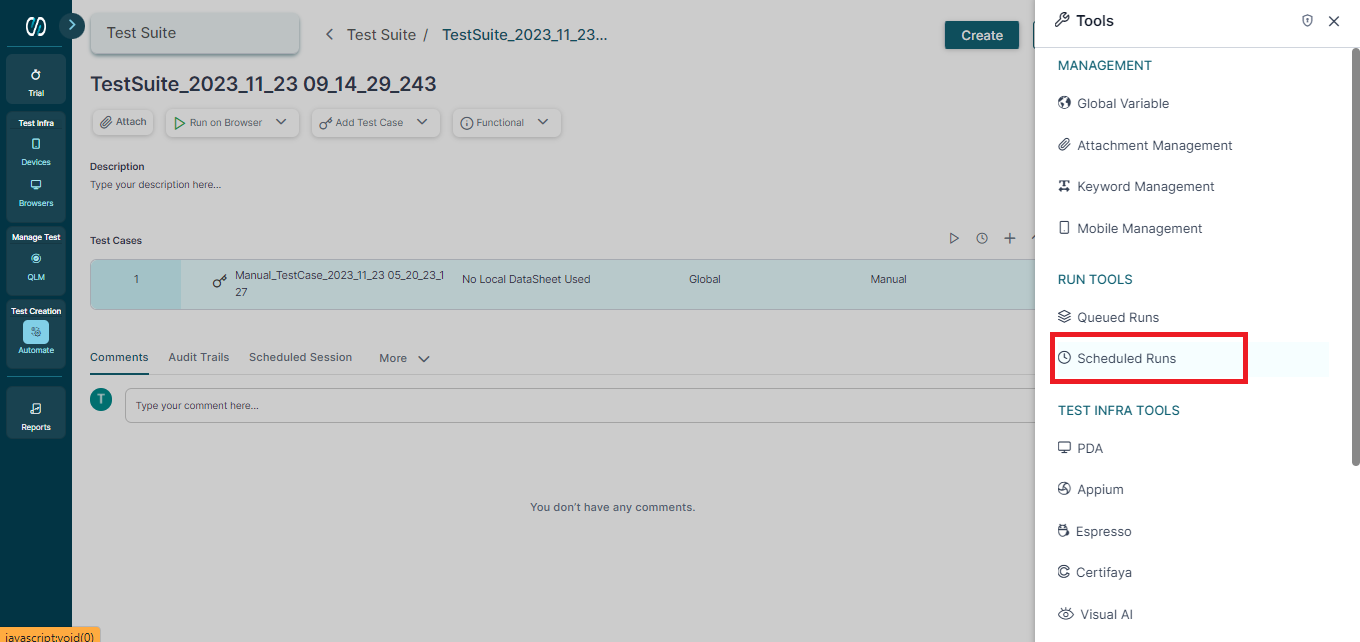
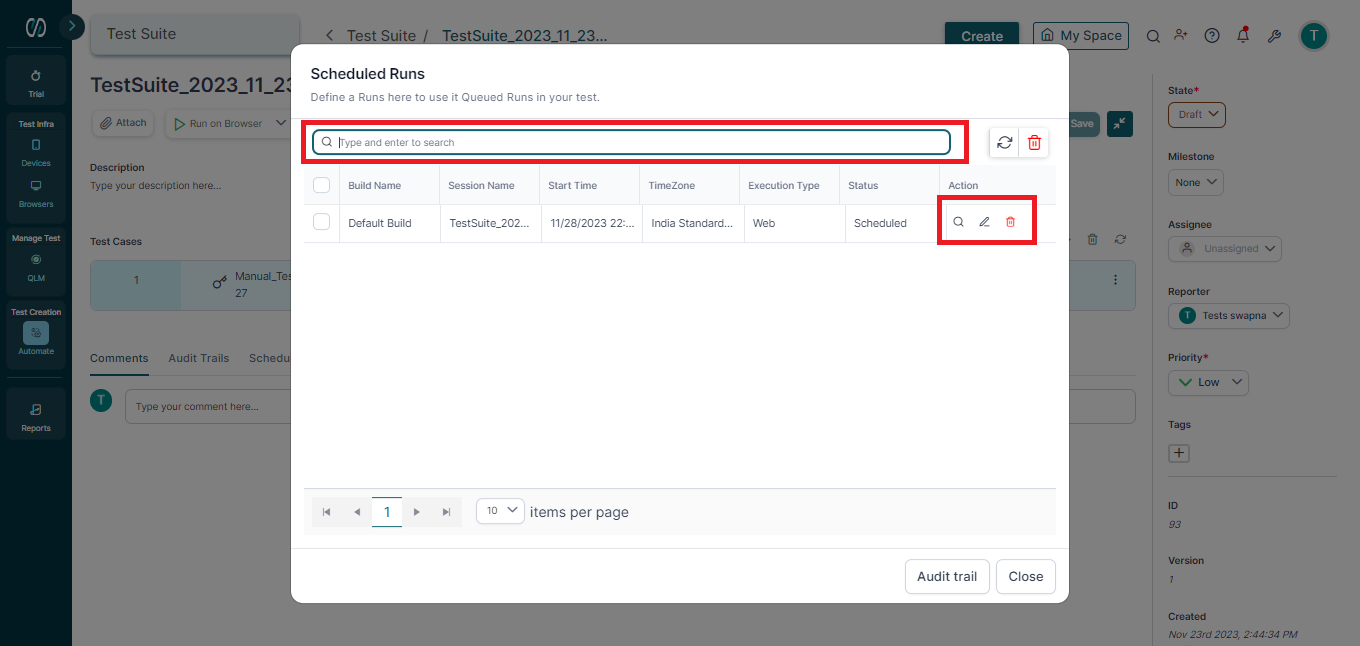
On clicking the Scheduled Runs tab, a window will appear with a list of scheduled test runs. You can search a scheduled run in the search bar.
You can also click the search edit and delete ions on a listed run to search browser combinations associated with a run, reschedule the run, or delete it.
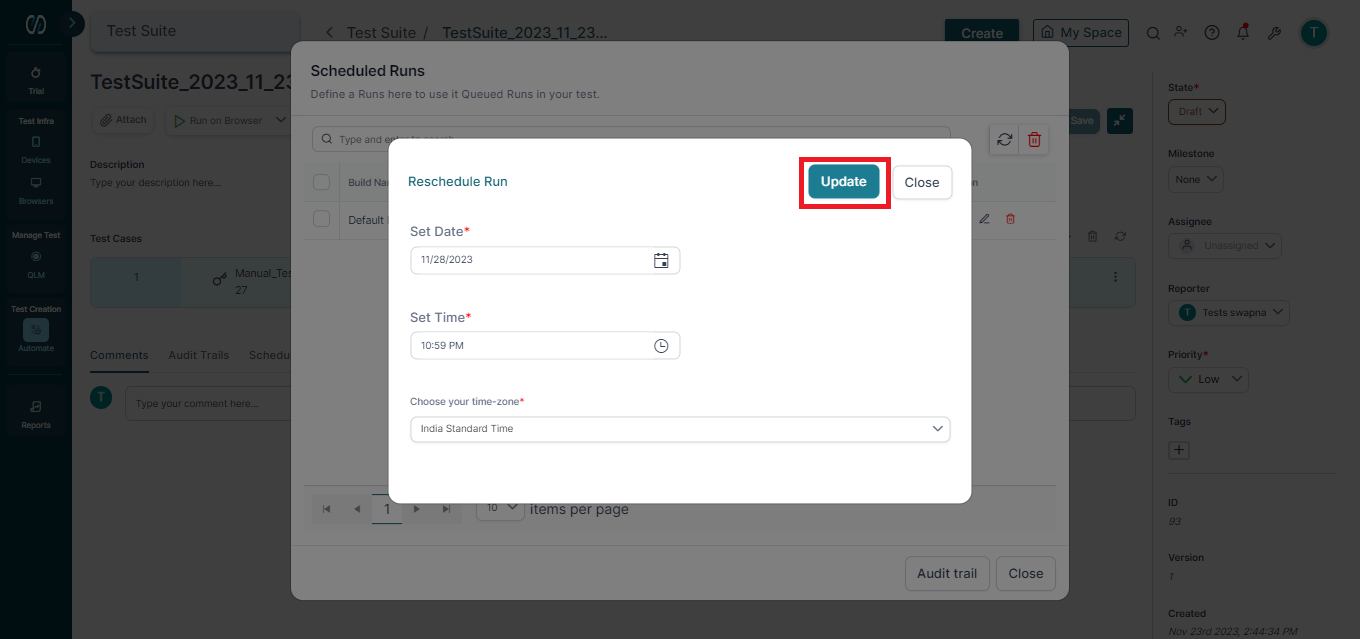
Once you click the reschedule icon on a scheduled test run, a pop-up window will appear where you can add the rescheduled date and time of execution. Once done, click the Update button at the top to finish rescheduling.
You've reached the end of this article and are now well-prepared to schedule test suites for execution.
Ready to dive deeper?
Explore, experiment, and achieve your testing goals on pCloudy!


