Overview
It is a functionality that gives the ability to record network traffic for HTTP/HTTPS requests during Android and iOS mobile app tests on real devices.
An HTTP Archive (HAR) file is a JSON-formatted archive file format for logging an application’s (either browser or a native/hybrid app) interaction with HTTP servers.
The specification for the HTTP Archive (HAR) format defines an archival format for HTTP transactions that can be used by a web browser to export detailed performance data about web pages it loads.
Prerequisite
- The user should have a registered pCloudy account
- SSL Pinning needs to be disabled to generate HAR for hybrid/native applications
Certificate required for HAR
Steps to Install (common to Android and iOS)-:
- On a Mobile device browser to mitm.it (please enable HAR before browsing )
- Download the certificate as per the OS of the device
- E.g. - For Android devices, continue with Android installation and for iOS, continue with iOS installation.
Steps for installing the certificate for iOS
For iOS, If the Install Profile does not open automatically follow the below steps :-
1. Go to Settings > General > Profile > mitmproxy to open it manually.
2. The wizard displays information on the proxy trust status. Click Install
3. The wizard displays a warning message regarding the trust status of the installation, Click Install.
4. When the installation completes, the wizard displays the updated certificate status of the proxy. Click Done.
5. After installing, trust the proxy.
6. Go to setting ->General > About - Click Certificate Trust Settings.
7. Set the trust setting for mitmproxy to True (selected).
8. Click Continue. The proxy is now trusted.
Steps for installing the certificate for Android
- once the file is downloaded (as mentioned in the step1), Open the downloaded file
- The installation prompts for a certificate name. Supply any name and click OK.
- Android users may need to set up an unlock credential PIN for the device. If you receive the following message "You need to set a lock screen PIN or password before you can use credential storage", click “OK” on the message
- The system will ask for different options for the unlock credentials.
- Select the PIN option. Enter a new four-digit PIN code. Click CONTINUE.
- Confirm the PIN on the next screen and click OK. The certificate is automatically installed.
- Note: If you see “, a Can't install CA certificates” message appears, follow the below steps :-
- Go to Settings > Security > Credential Storage > Install from device storage. Tap CA certificate.
- At the bottom of the warning message that appears, tap Install anyway.
- The certificate is installed and a CA certificate is installed. The message appears at the bottom of the Install from device storage screen.
- Before releasing the device, disable the Screen Unlock PIN code - Goto Settings > Security > Screen Lock and select None
- To test if it works, browse again to "mitm.it" and verify the message “If you can see this, traffic is not passing through “mitmproxy” is not shown
Steps to capture Network Traffic
-
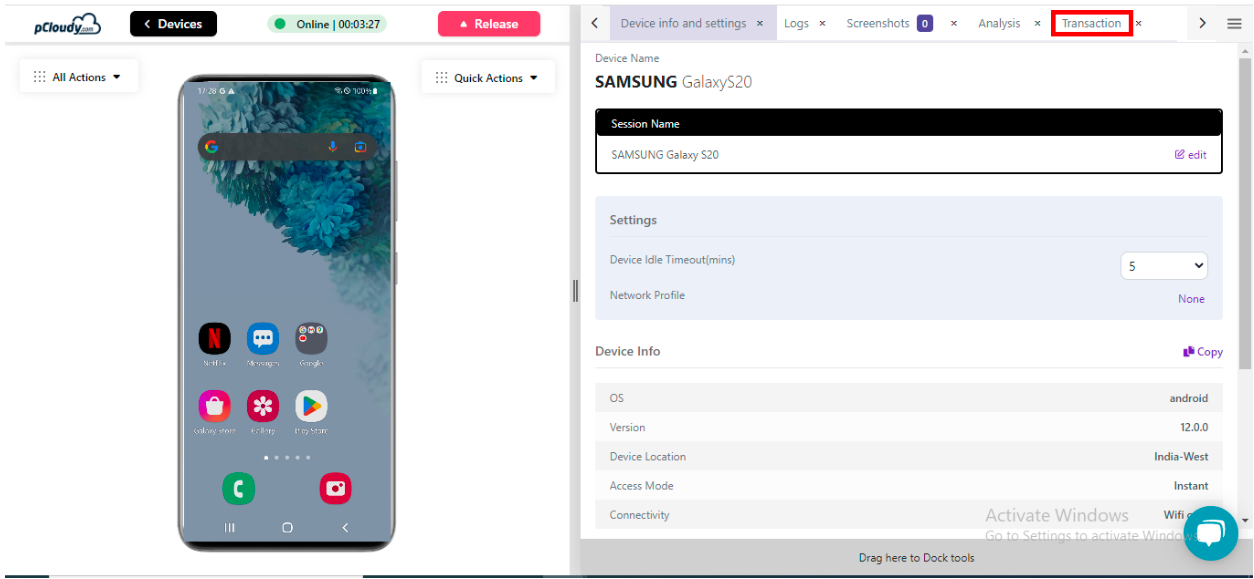
Login to the platform and connect to any available Devices and click on Transaction
-
Select the application package of the installed application
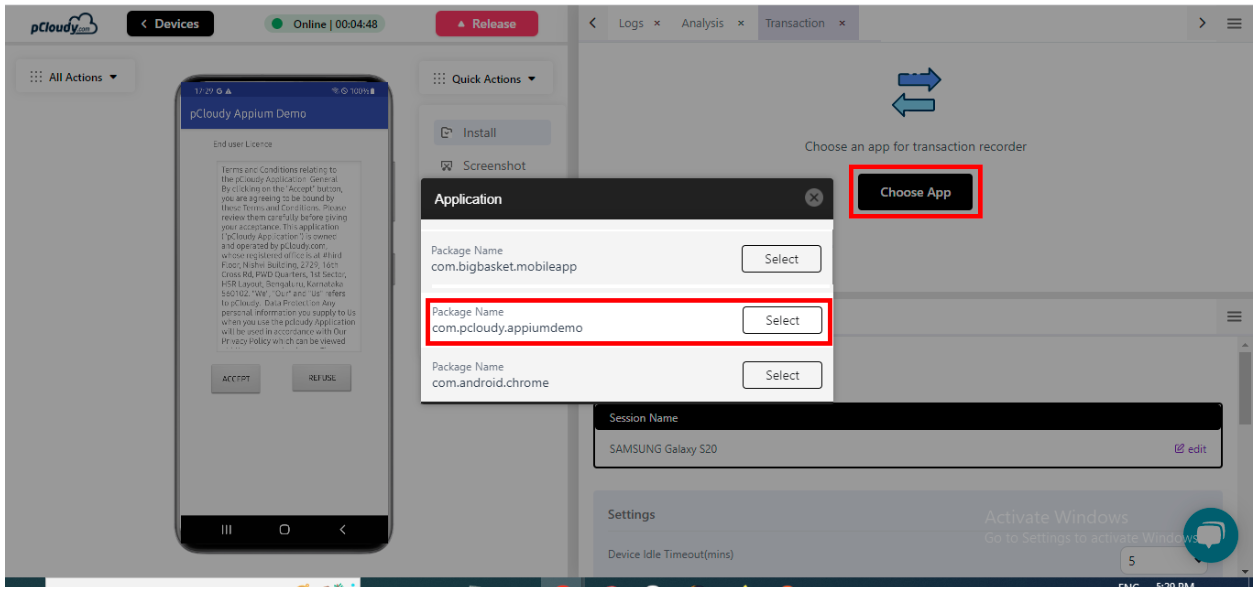
Note: For browsers, the user will need to select the browser package. e.g for ios safari browser, user need to select COM.APPLE.MOBILESAFARI
-
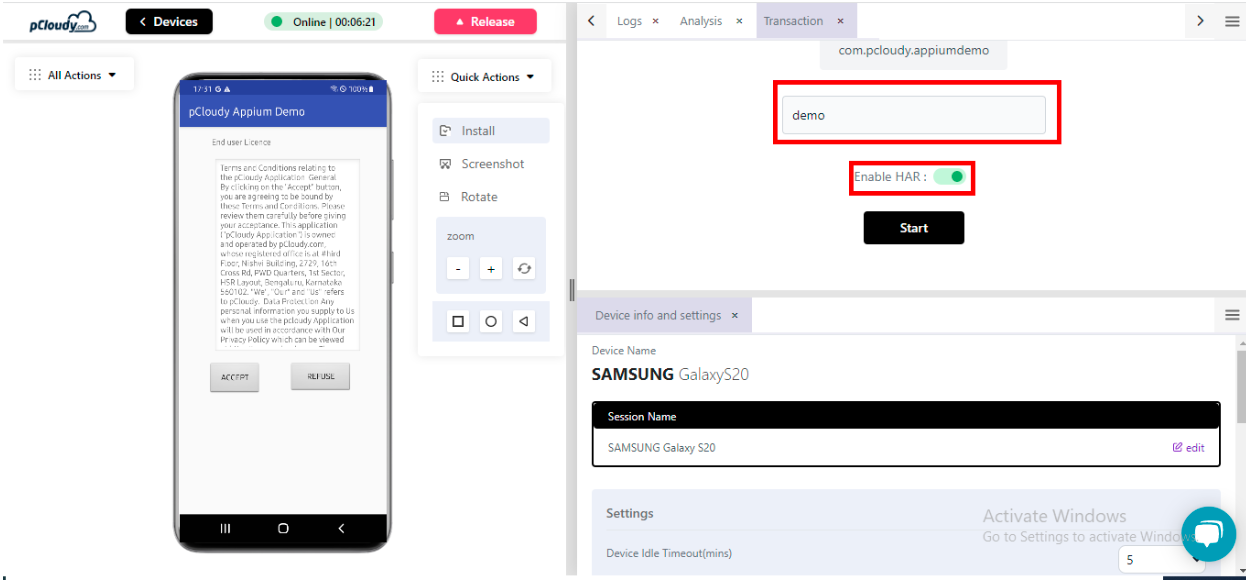
Enter the transaction name and Enable HAR. Please ensure that the transaction name does not contain any space.
-
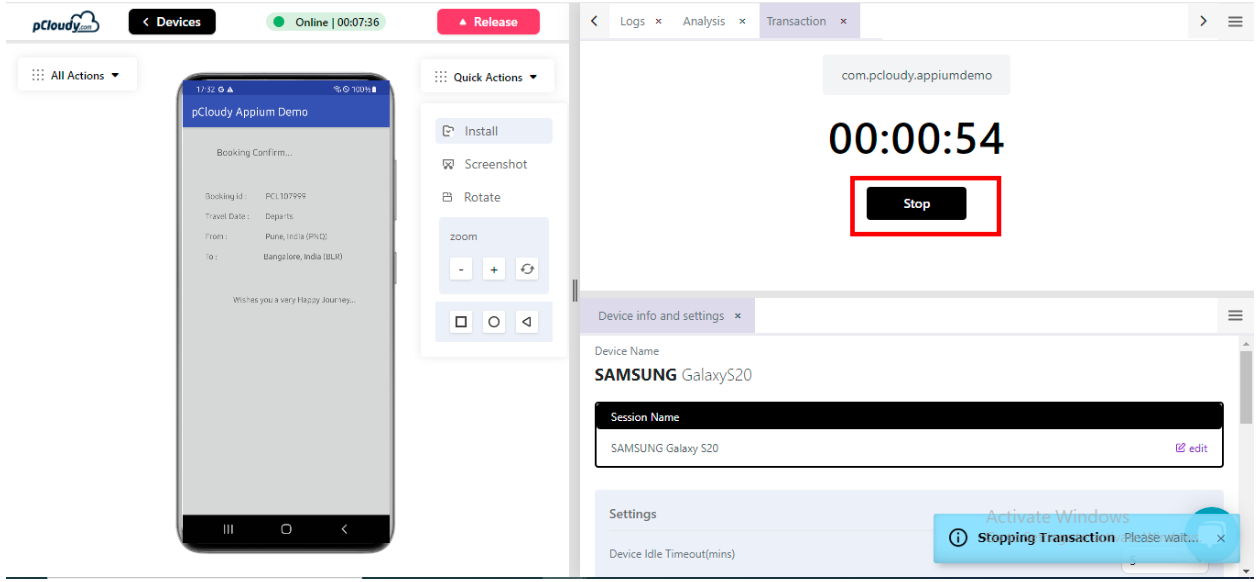
Once the user has completed the transaction, the user will need to click on “Stop Transaction" to stop the transaction. Once the transaction is stopped the user should be able to save the transaction or restart and start a new transaction.
-
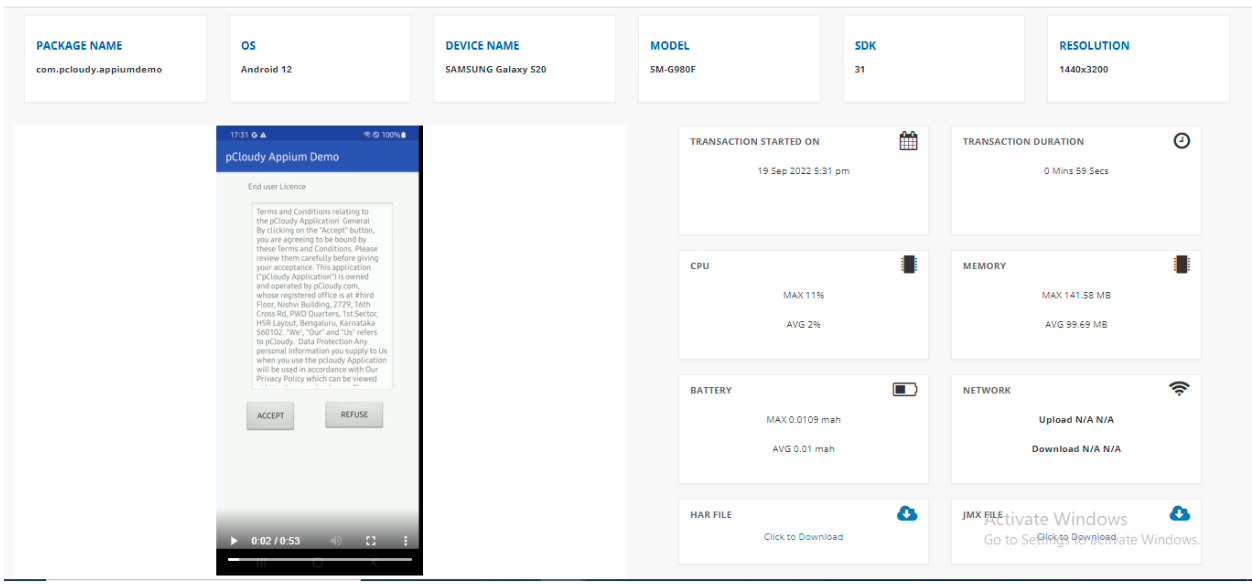
The user can click on “View Report” to view the report generated at run time
-
User can also go to the Report section and navigate to All Reports, click on view icon to open the session report
-
Go to “Transaction Report” section and click on view report. Users will be able to view the report by clicking on the "View Report" button. The user should be able to get the below-mentioned information from the report.
- Package Name
- OS
- Device Name
- Model
- SDK
- Resolution
- Transaction Duration
- Performance related information (CPU, Memory, Battery, Network)
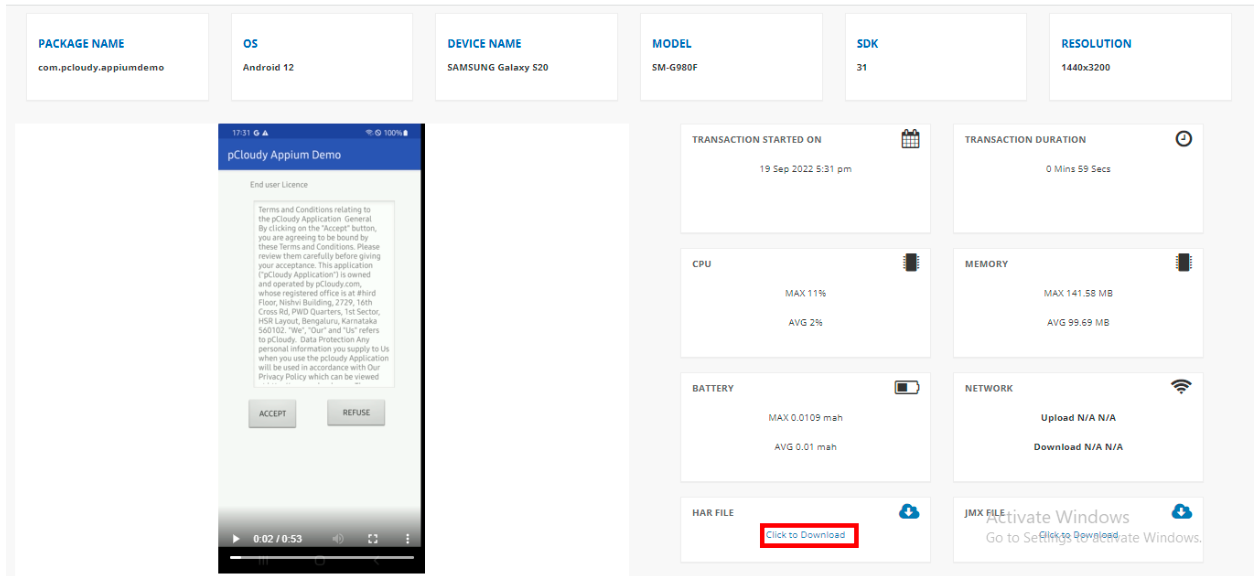
Note: Once the Transaction is complete the User will be able to download the HAR file
View HAR File Example
On the generated transaction report download the generated HAR file as shown below
View JMX file
Download the generated JMX file from the transaction report
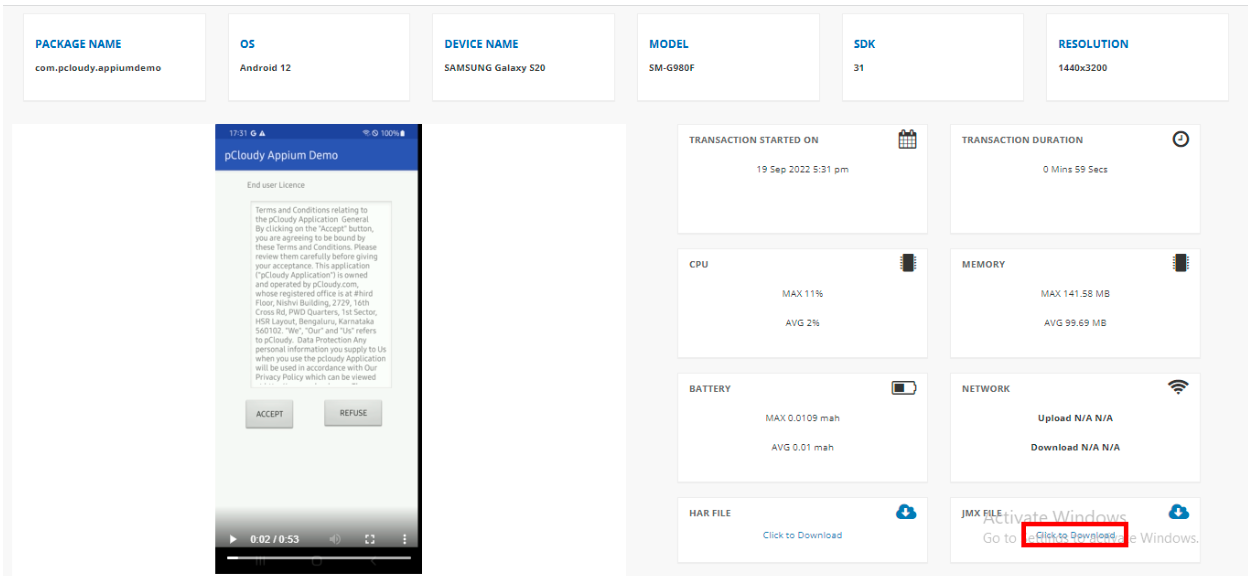
A JMX file is a saved JMeter project in XML format
How to Generate HAR through Appium script:
Users can use the below mentioned command in the appium script to generate the HAR file
Map<String, Object> params = new HashMap<>();
//Enter transaction name
Note: The Transaction name should not contain any space
params.put("transactionName", "Trans_Login");
//Enable/disable HAR by putting true/false
params.put("enableHar", true);
Note: HAR file name should not contain any space
params.put("harFileName", "harfile_Login");
//Start transaction
driver.executeScript("mobile:transaction:start",params);
Write--------Your ------------script
//Stop transaction
driver.executeScript("mobile:transaction:stop",params);