- 04 Feb 2024
- 2 Minutes to read
- Print
- DarkLight
Creating Manual Test Case in QLM
- Updated on 04 Feb 2024
- 2 Minutes to read
- Print
- DarkLight
Every organization has a repository of manual test cases that are indispensable for their testing process. For example, for every UI-related release, testers manually asses the UI features from an end user's perspective.
To make their job easier, Pcloudy’s QLM provides a platform for testers and other stakeholders to create, track, and manage their manual test cases in one place. This functionality eliminates the need for extensive spreadsheets for manual test case management, enhancing productivity and collaboration within the organization.
Let's look into an example of creating a manual test case in QLM in a few easy steps. Here, we will create a test case on sign-in functionality for the Pcloudy University URL.
Navigate to the Test section in QLM.
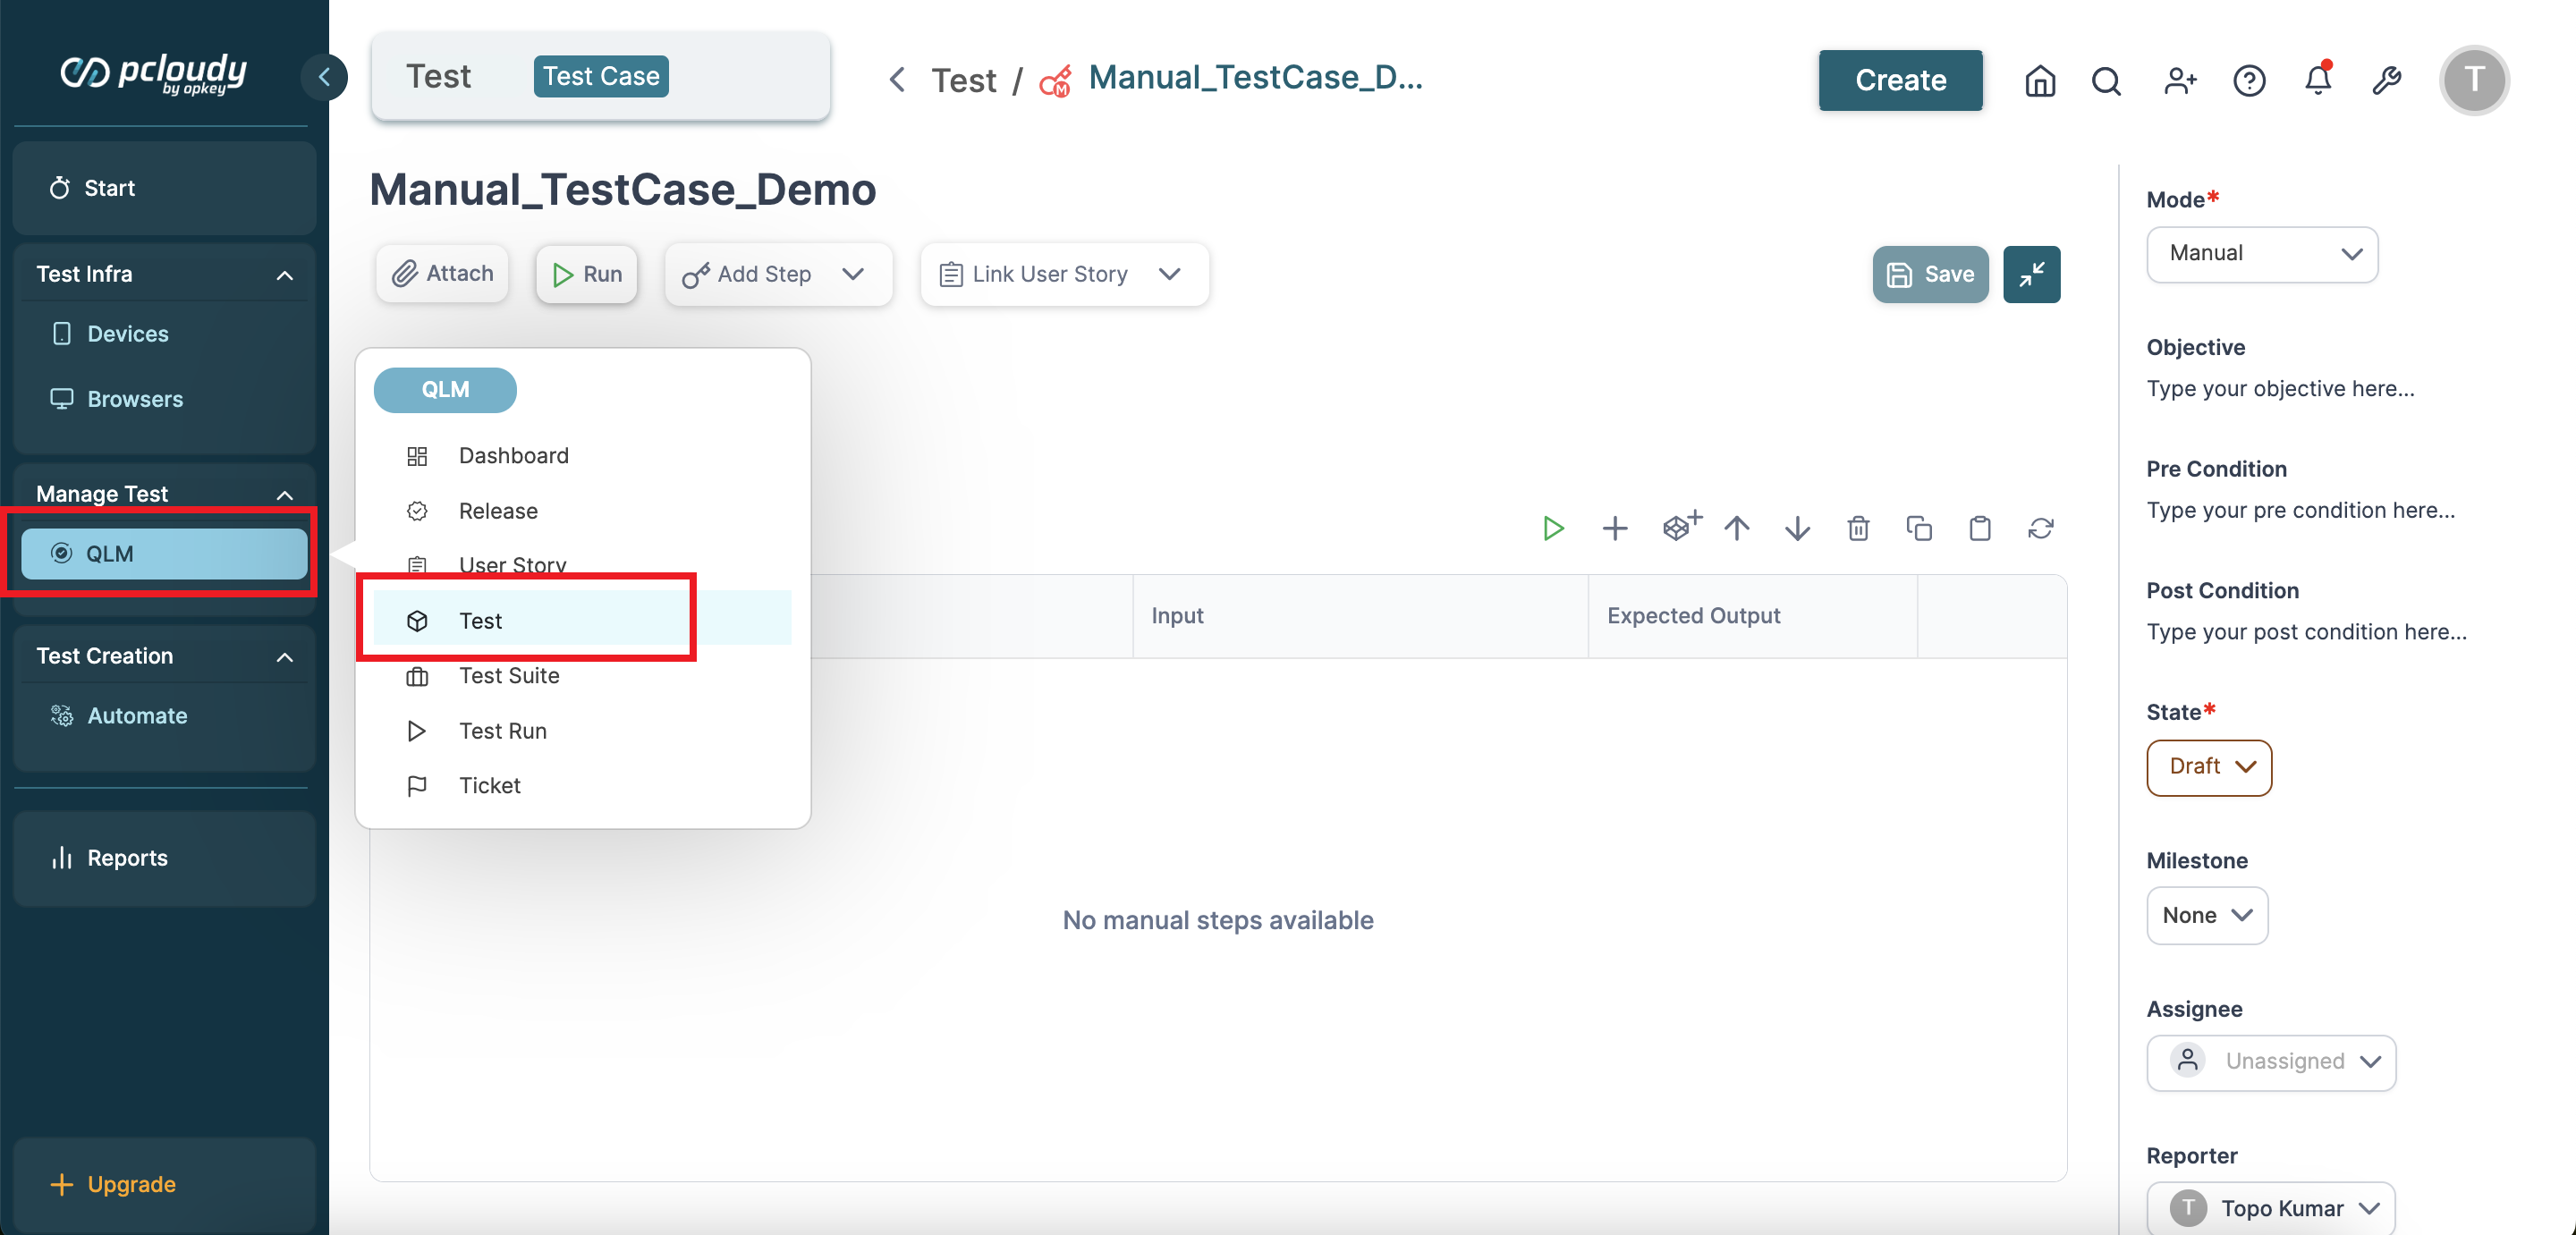
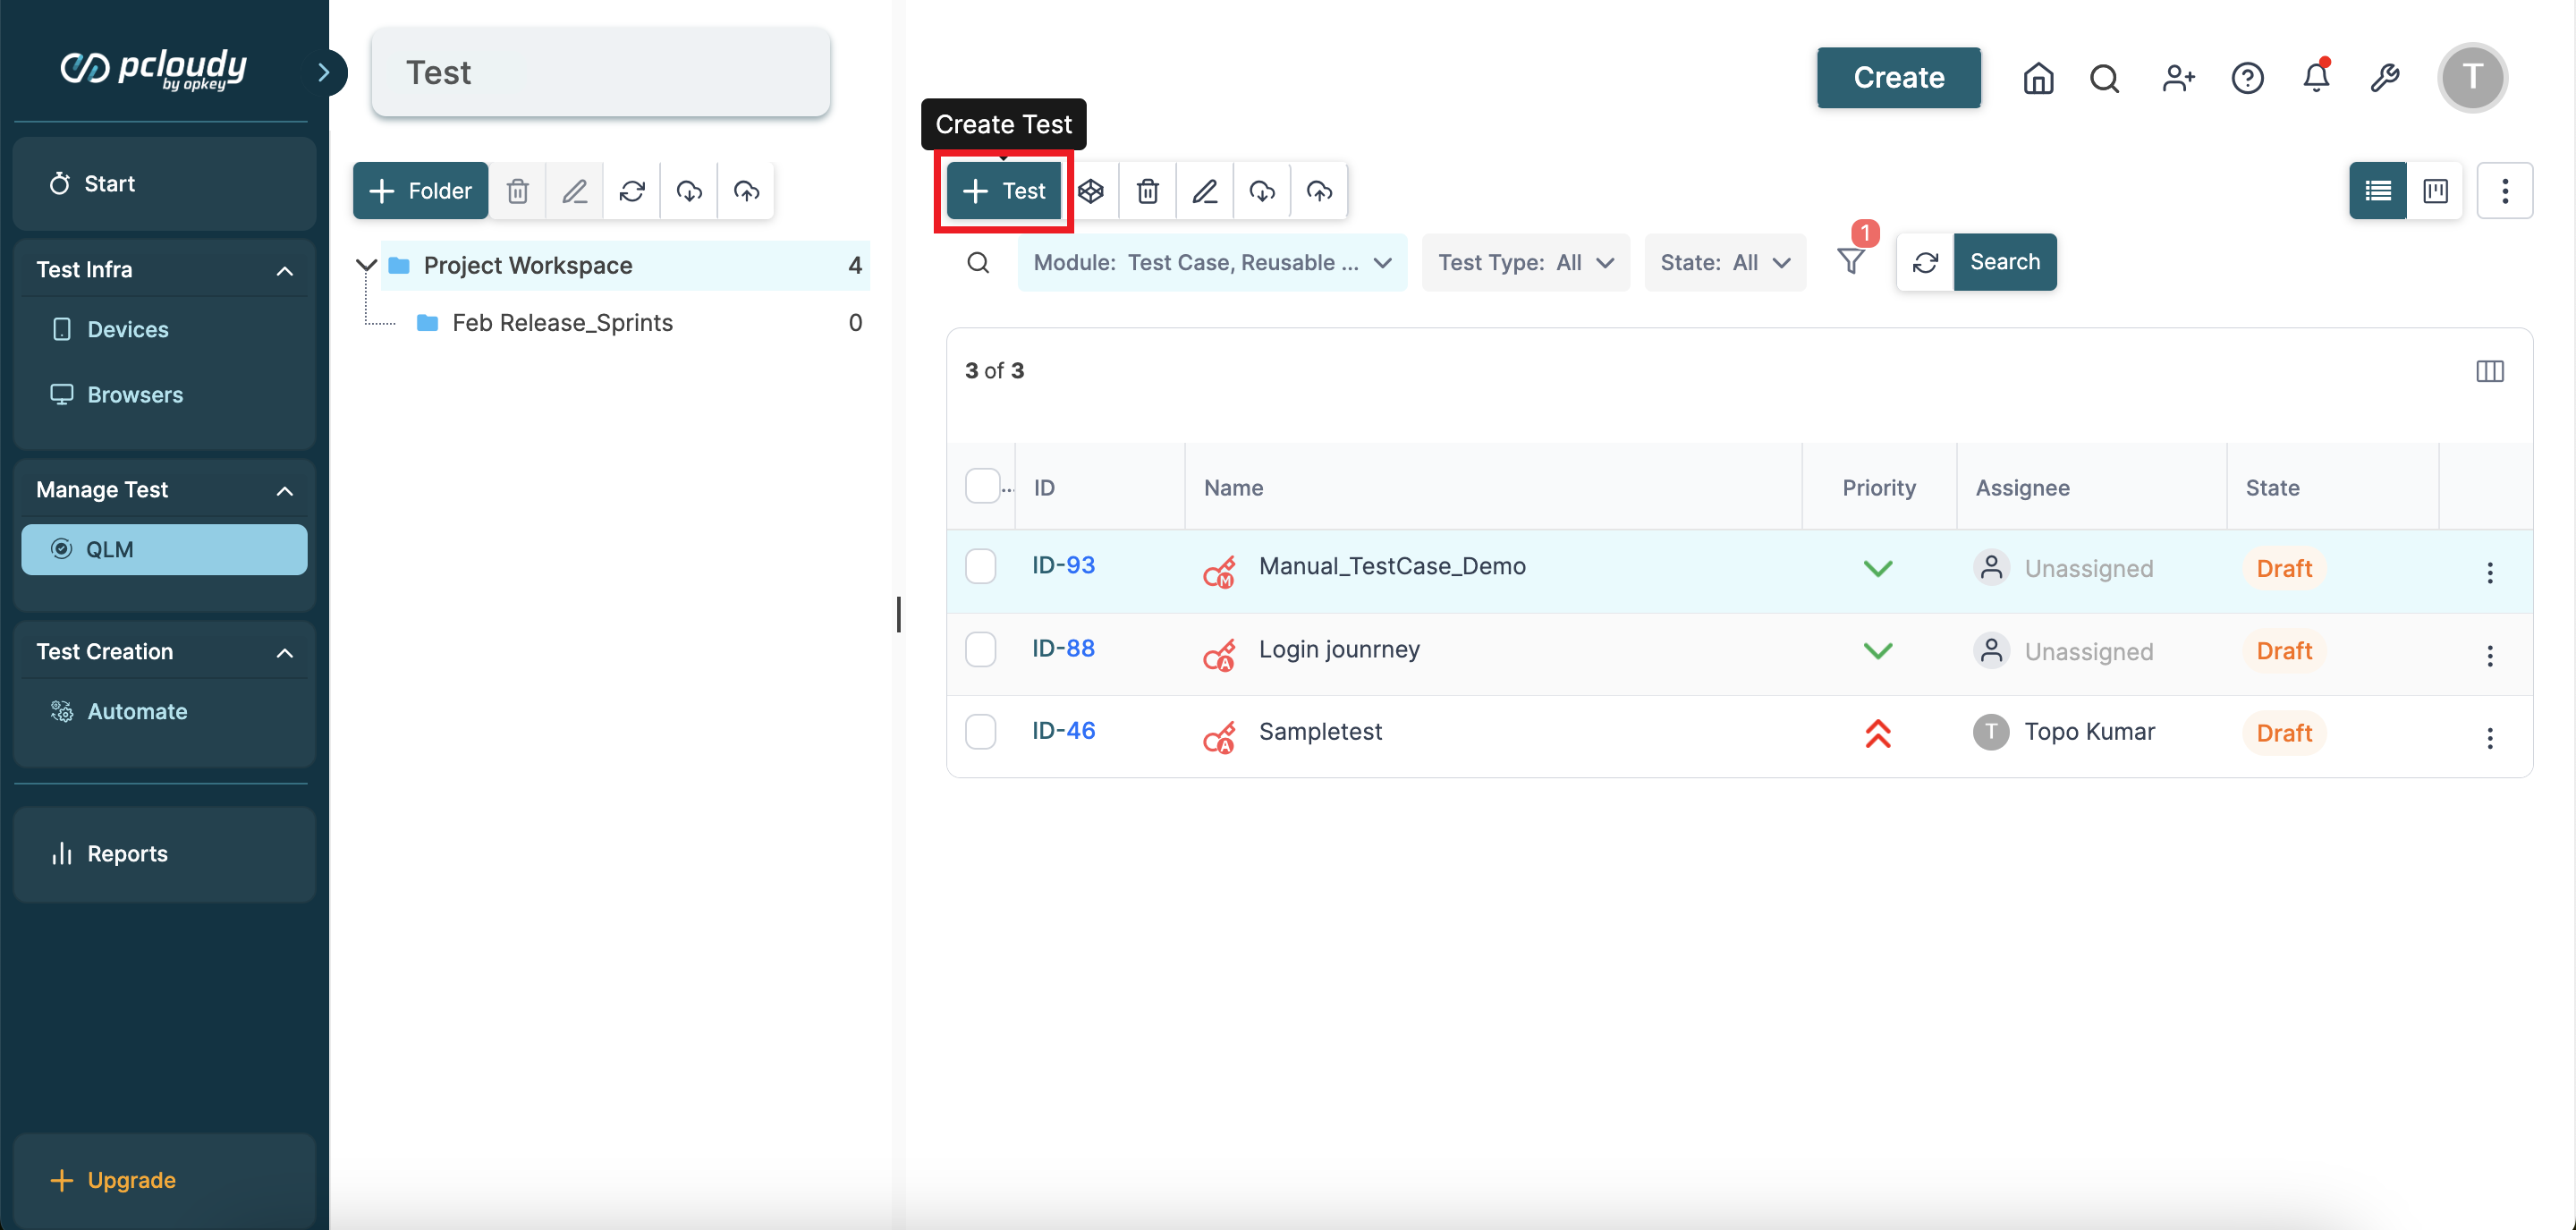
Click the + Create Test button and select Manual Test Case from the dropdown.
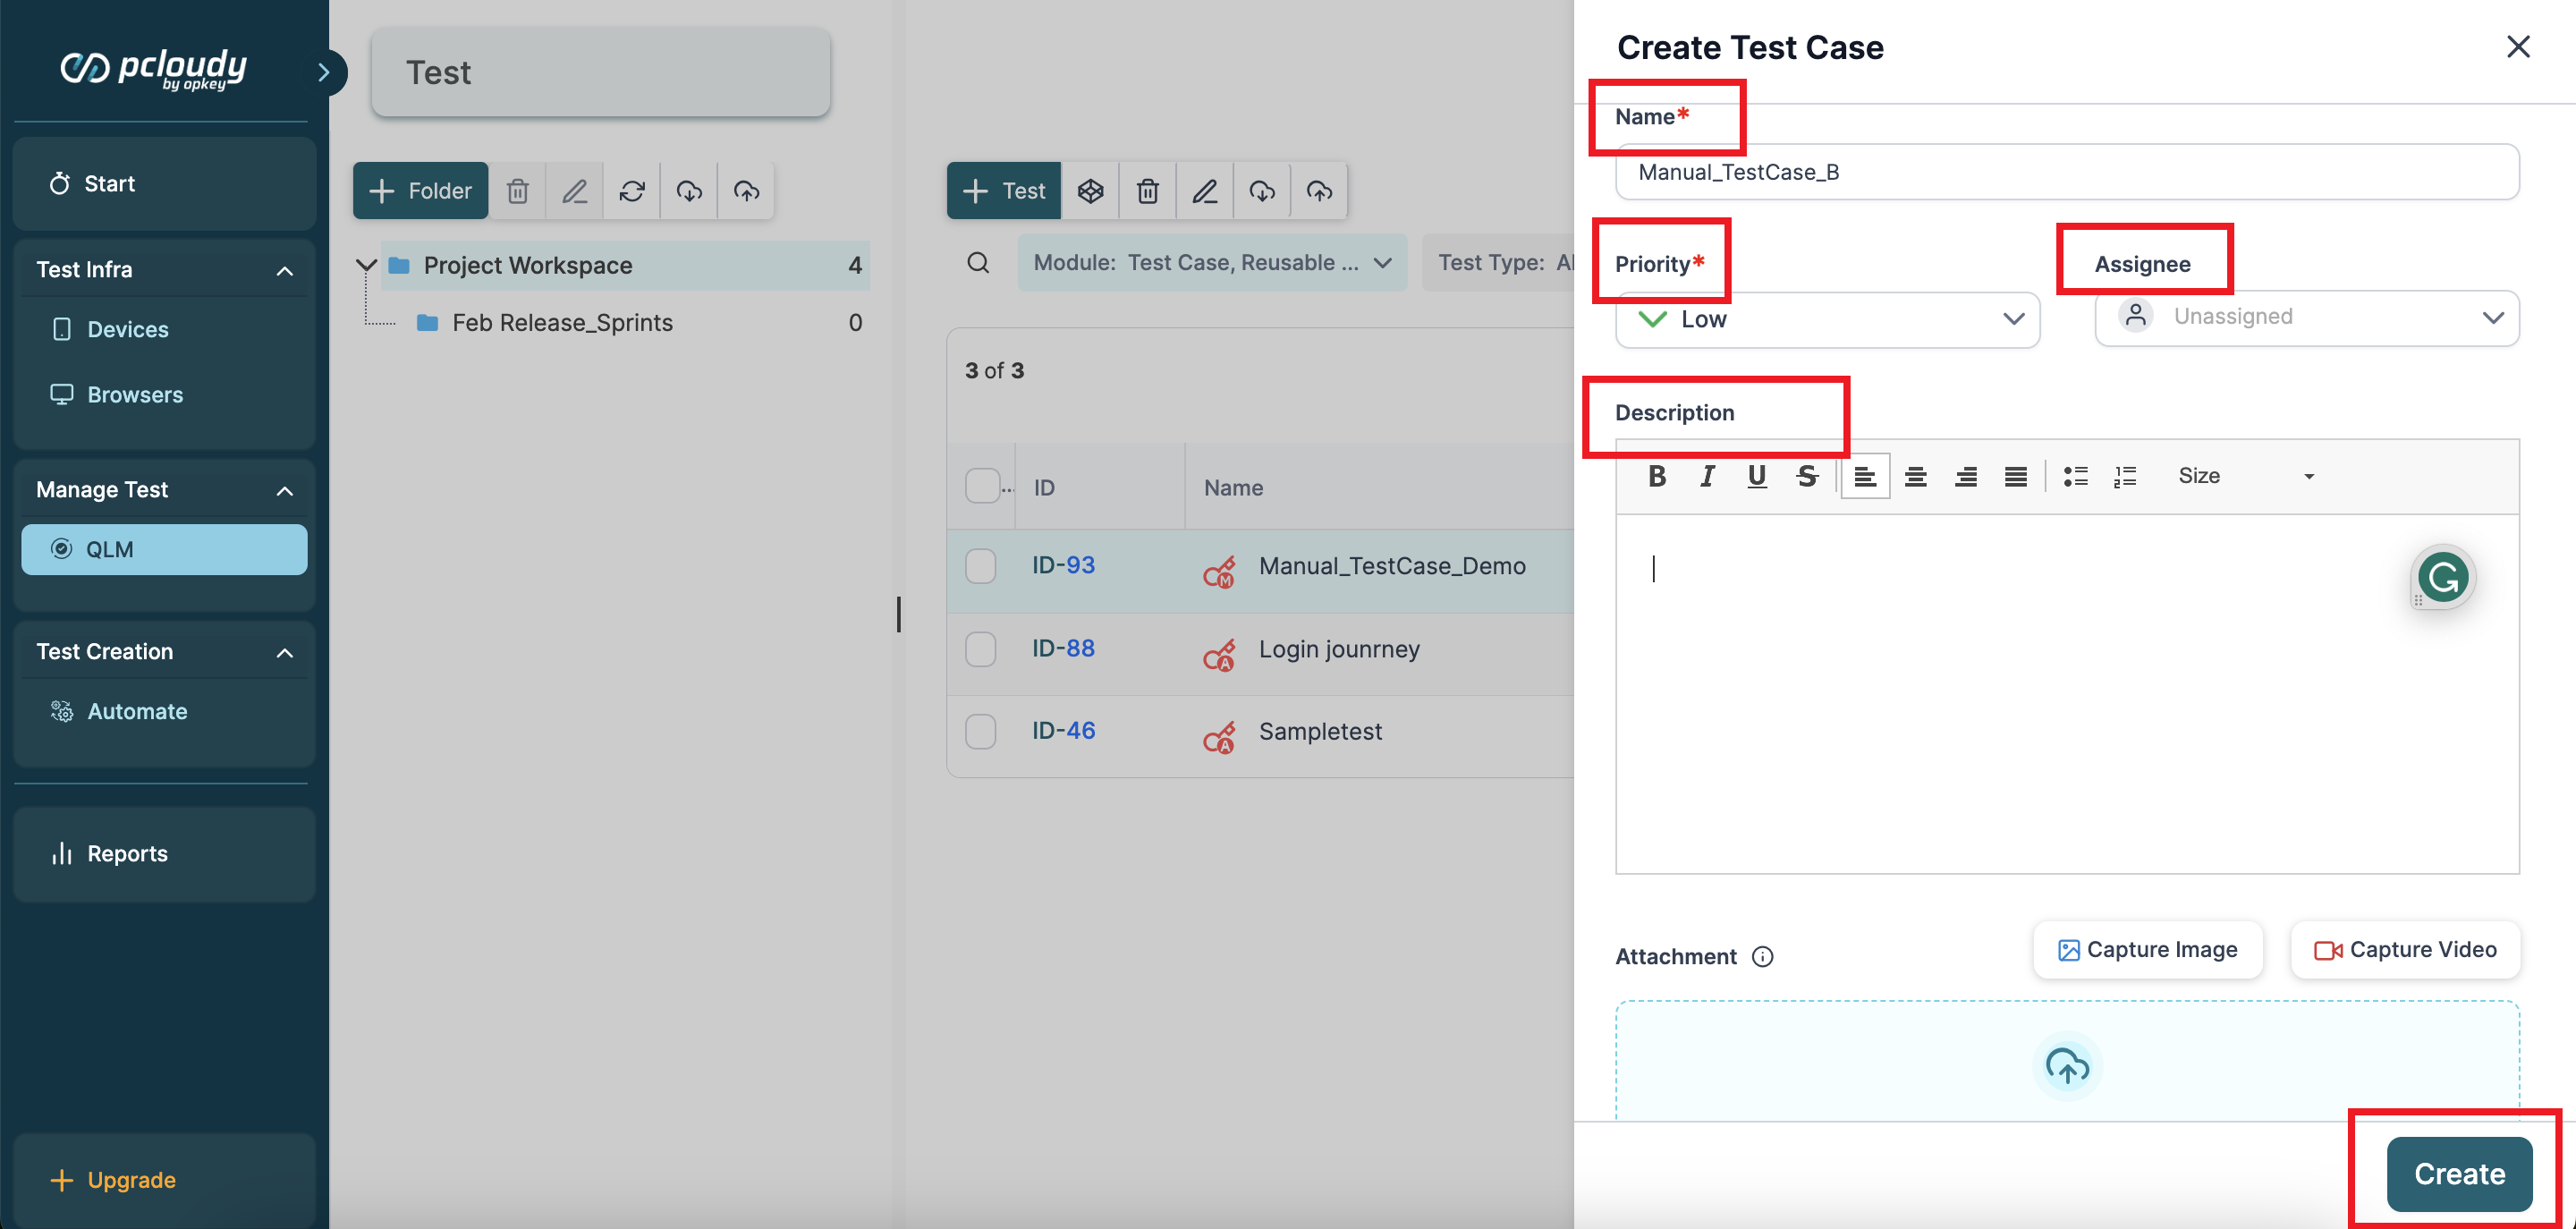
A Create Test Case page opens on the right. Enter the test name, set priority level, choose an assignee, add description, and click the Create button at the bottom.
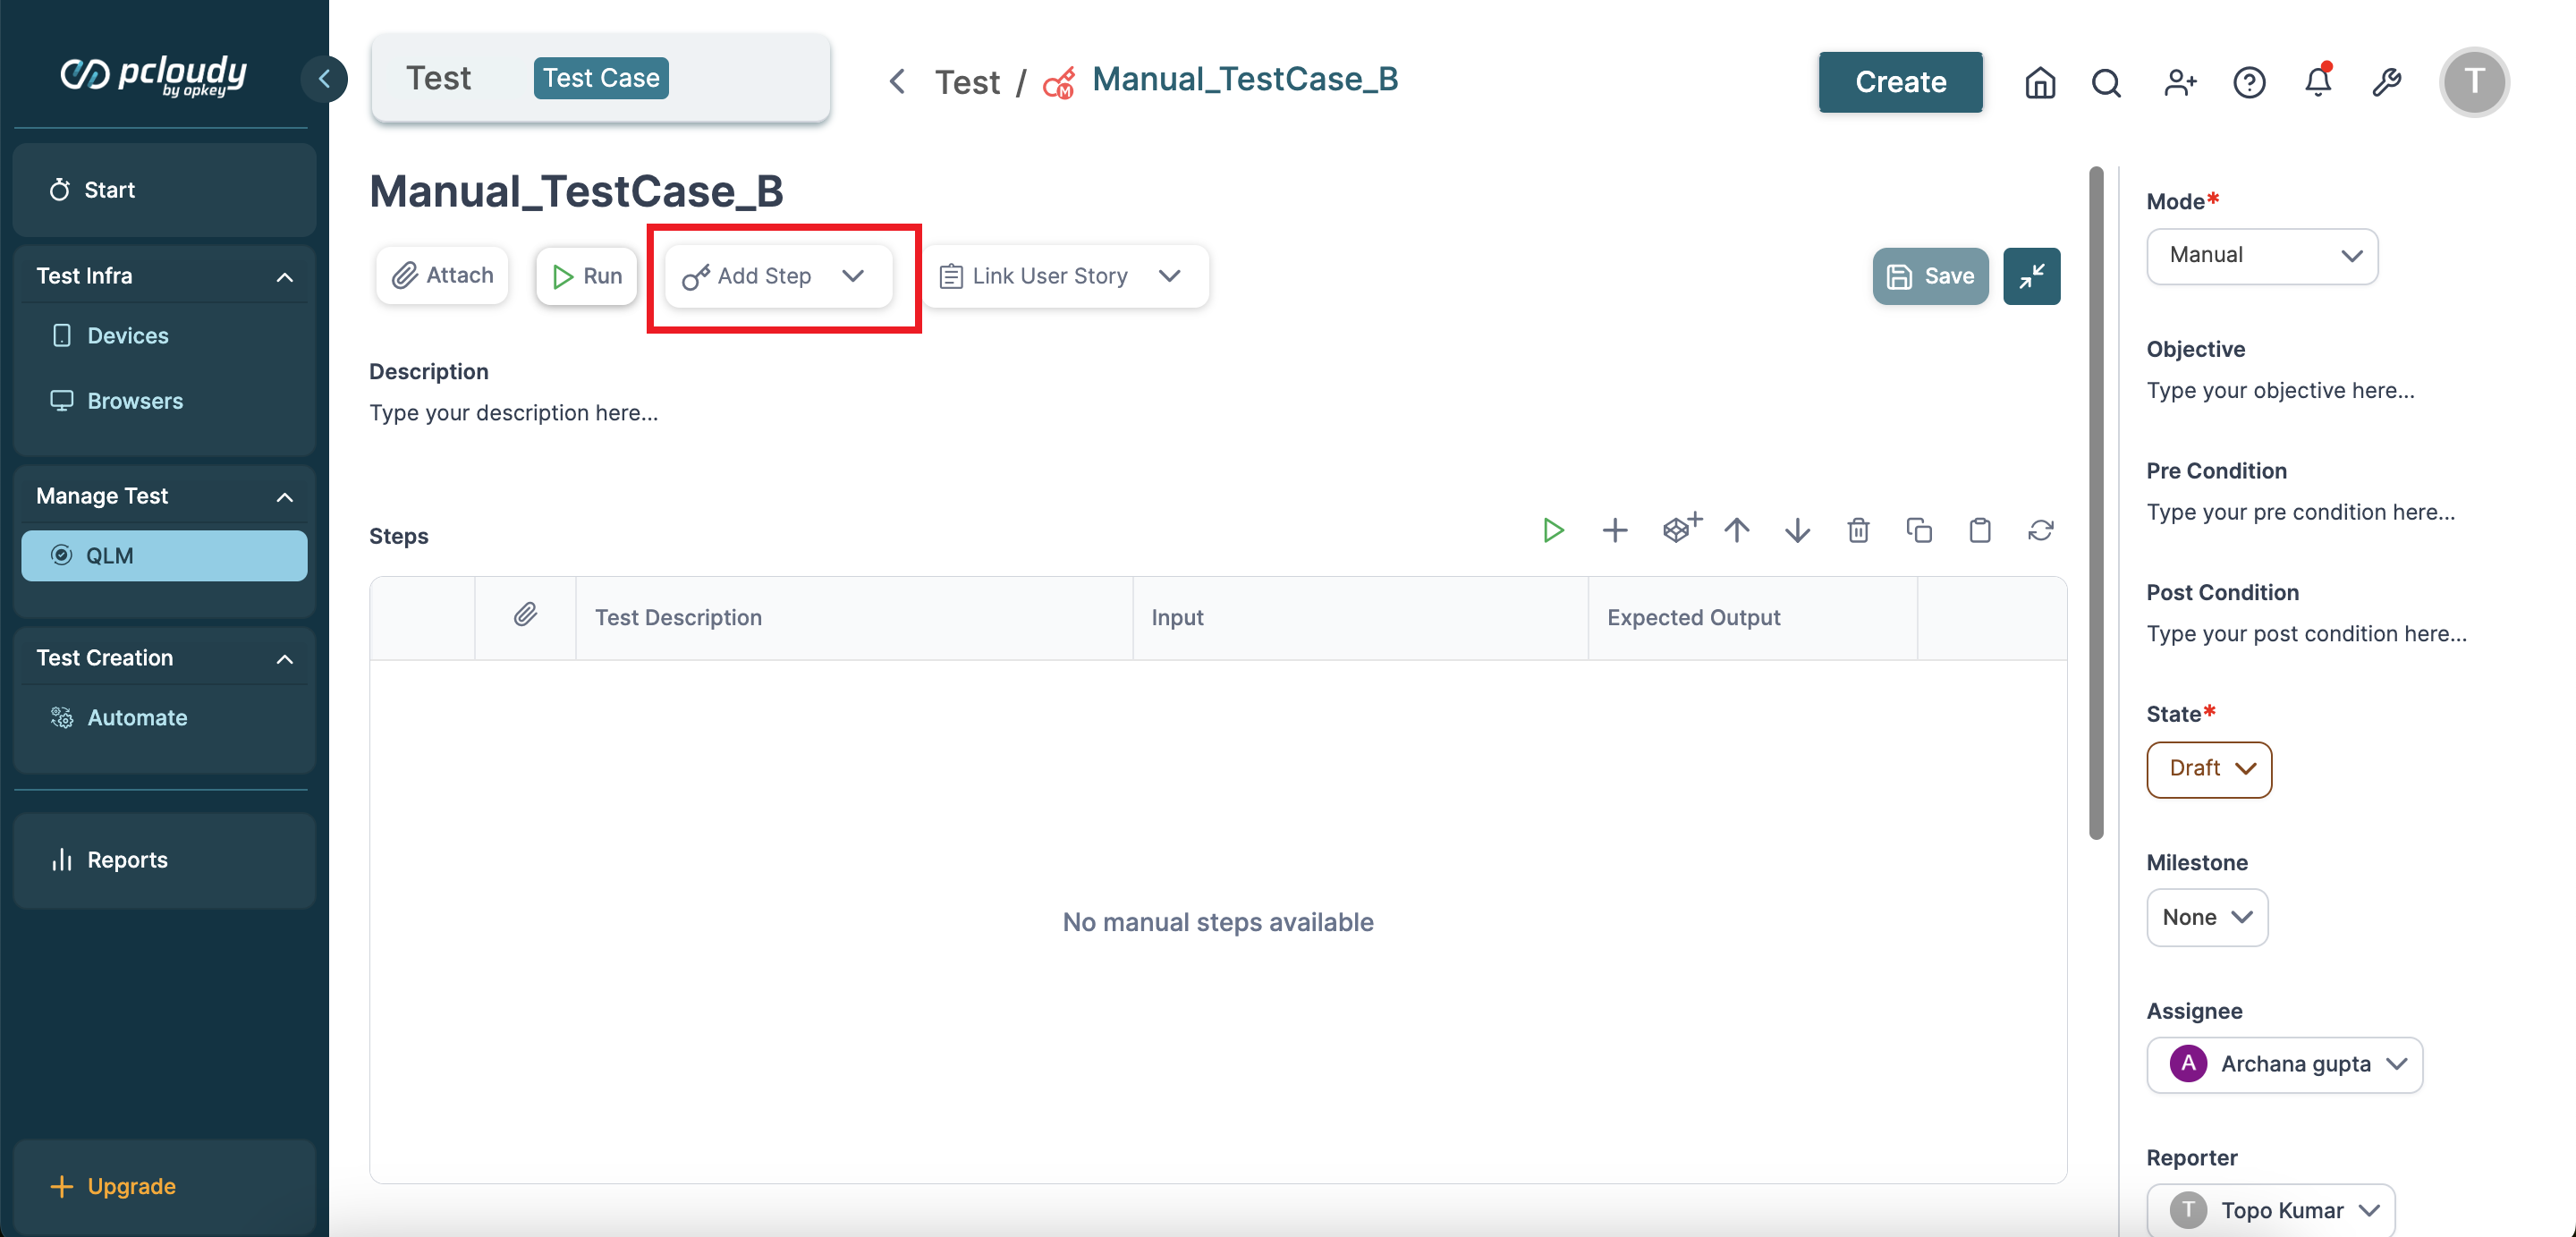
An empty manual test case is created. To add a step in the manual test case, click Add Step.
A step is added to the test case. Click Add input arguments to add data. You can also add data to a test step by clicking the three dots icon on the right of the test step and selecting Set input data.
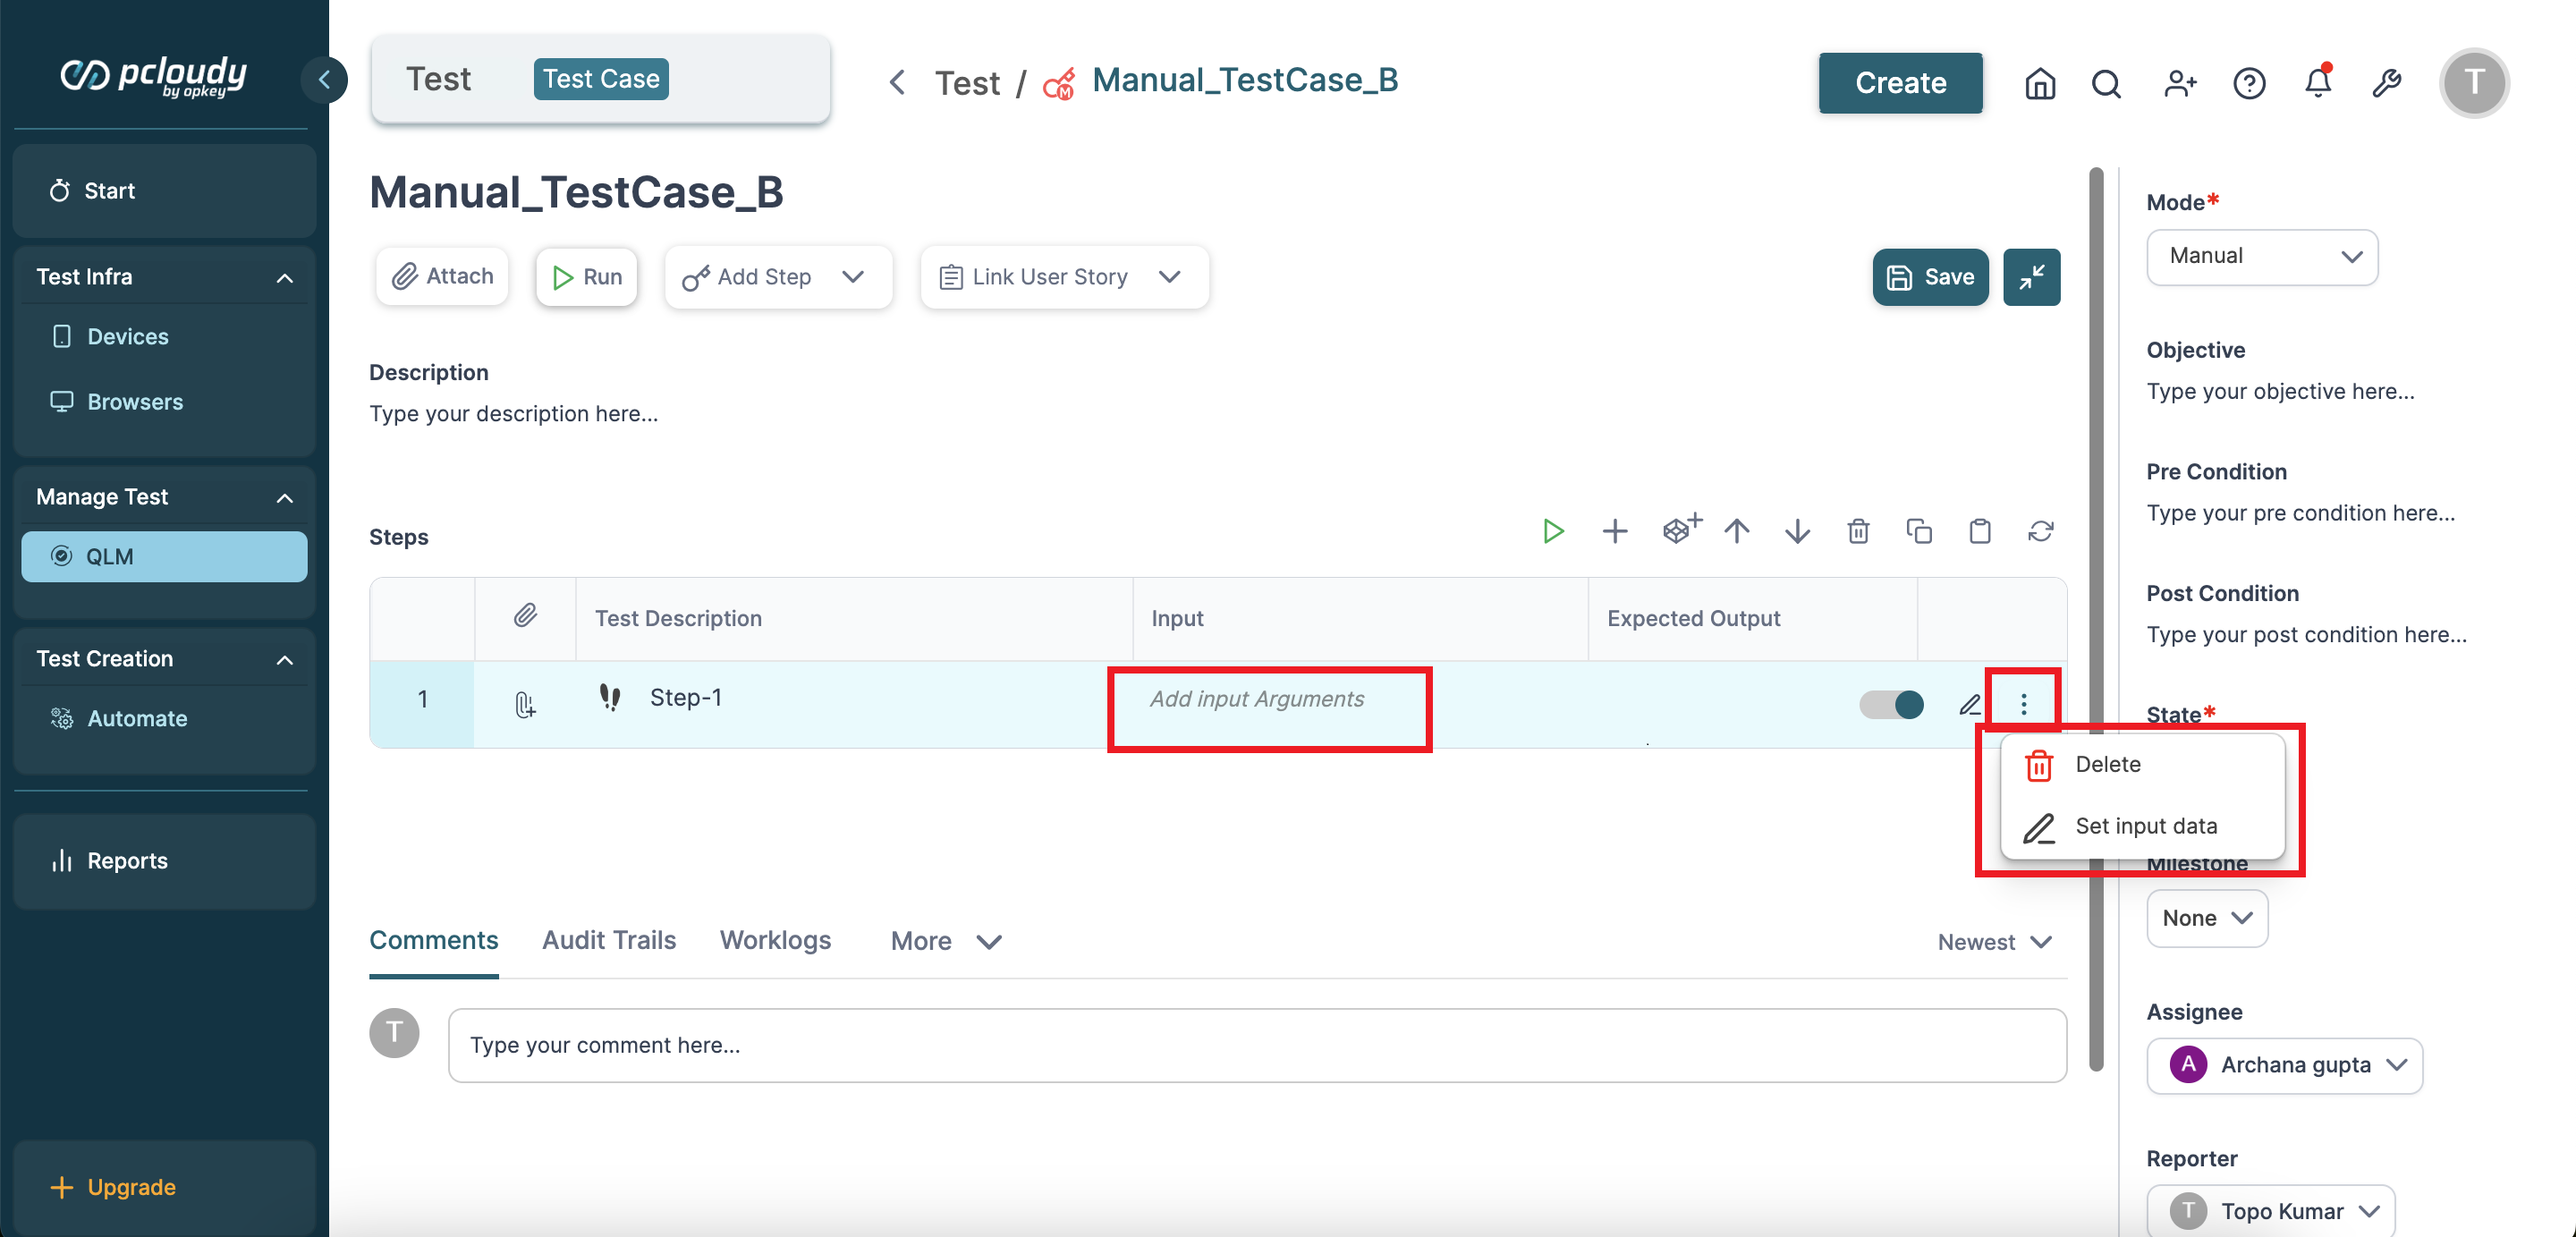
The Edit data of step page opens on the right. You can add input parameters by clicking the + icon at the top
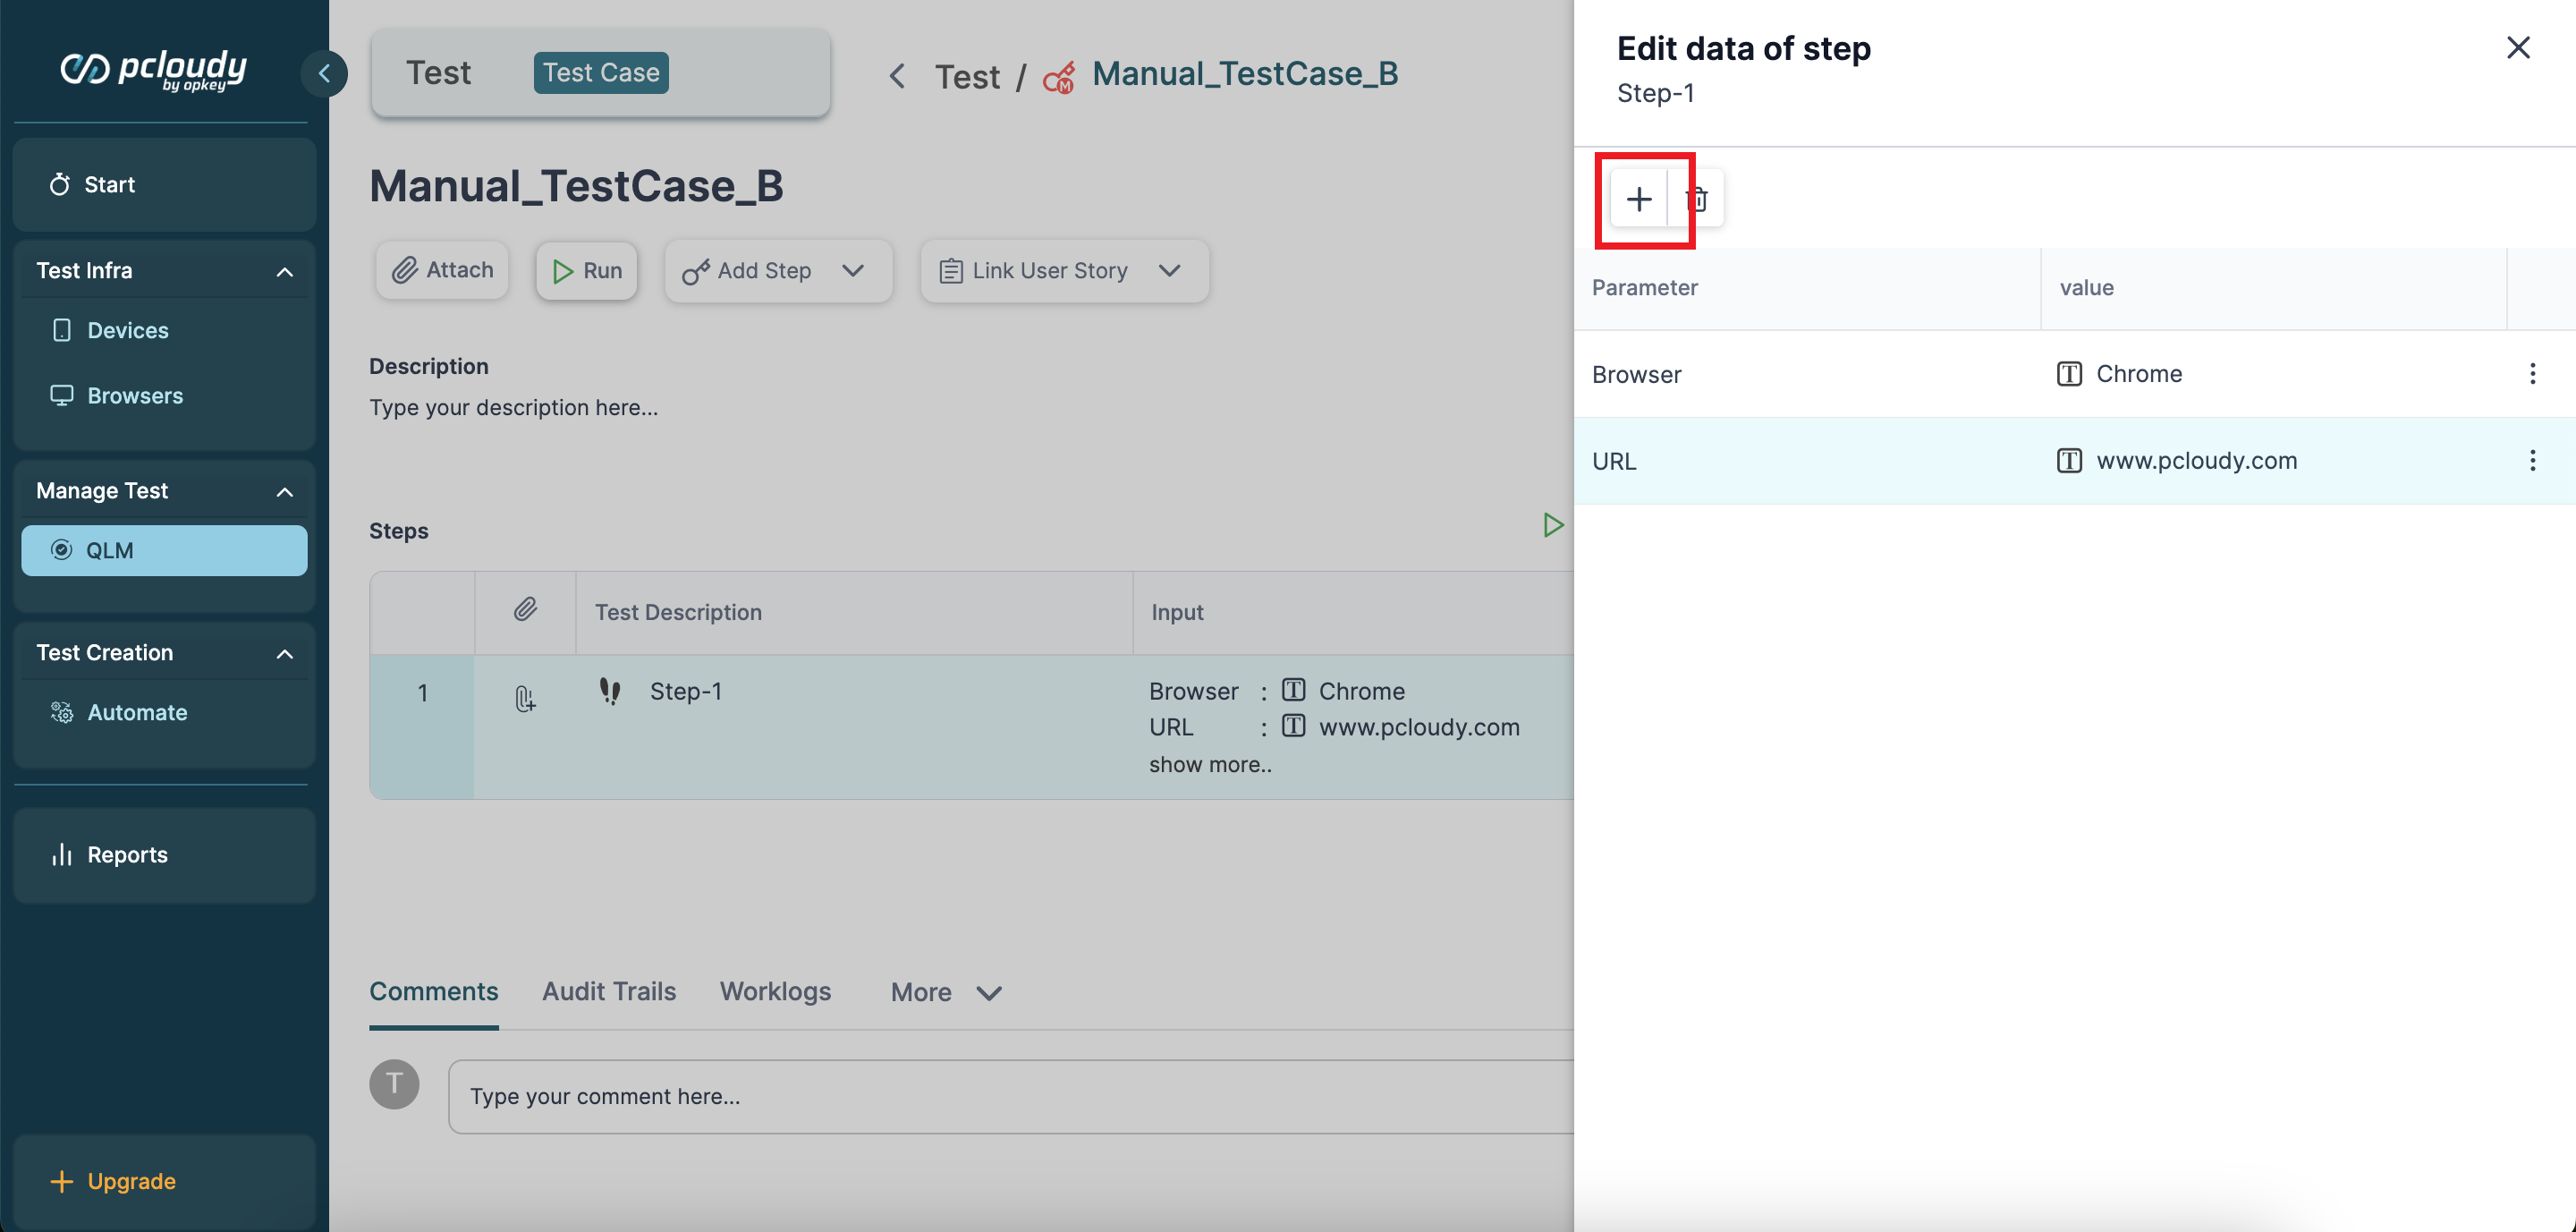
In this example, we have added Browser as parameter 1 and Chrome as its value. Similarly, we have added URL as parameter 2 and https://www.pcloudy.com/ as value.

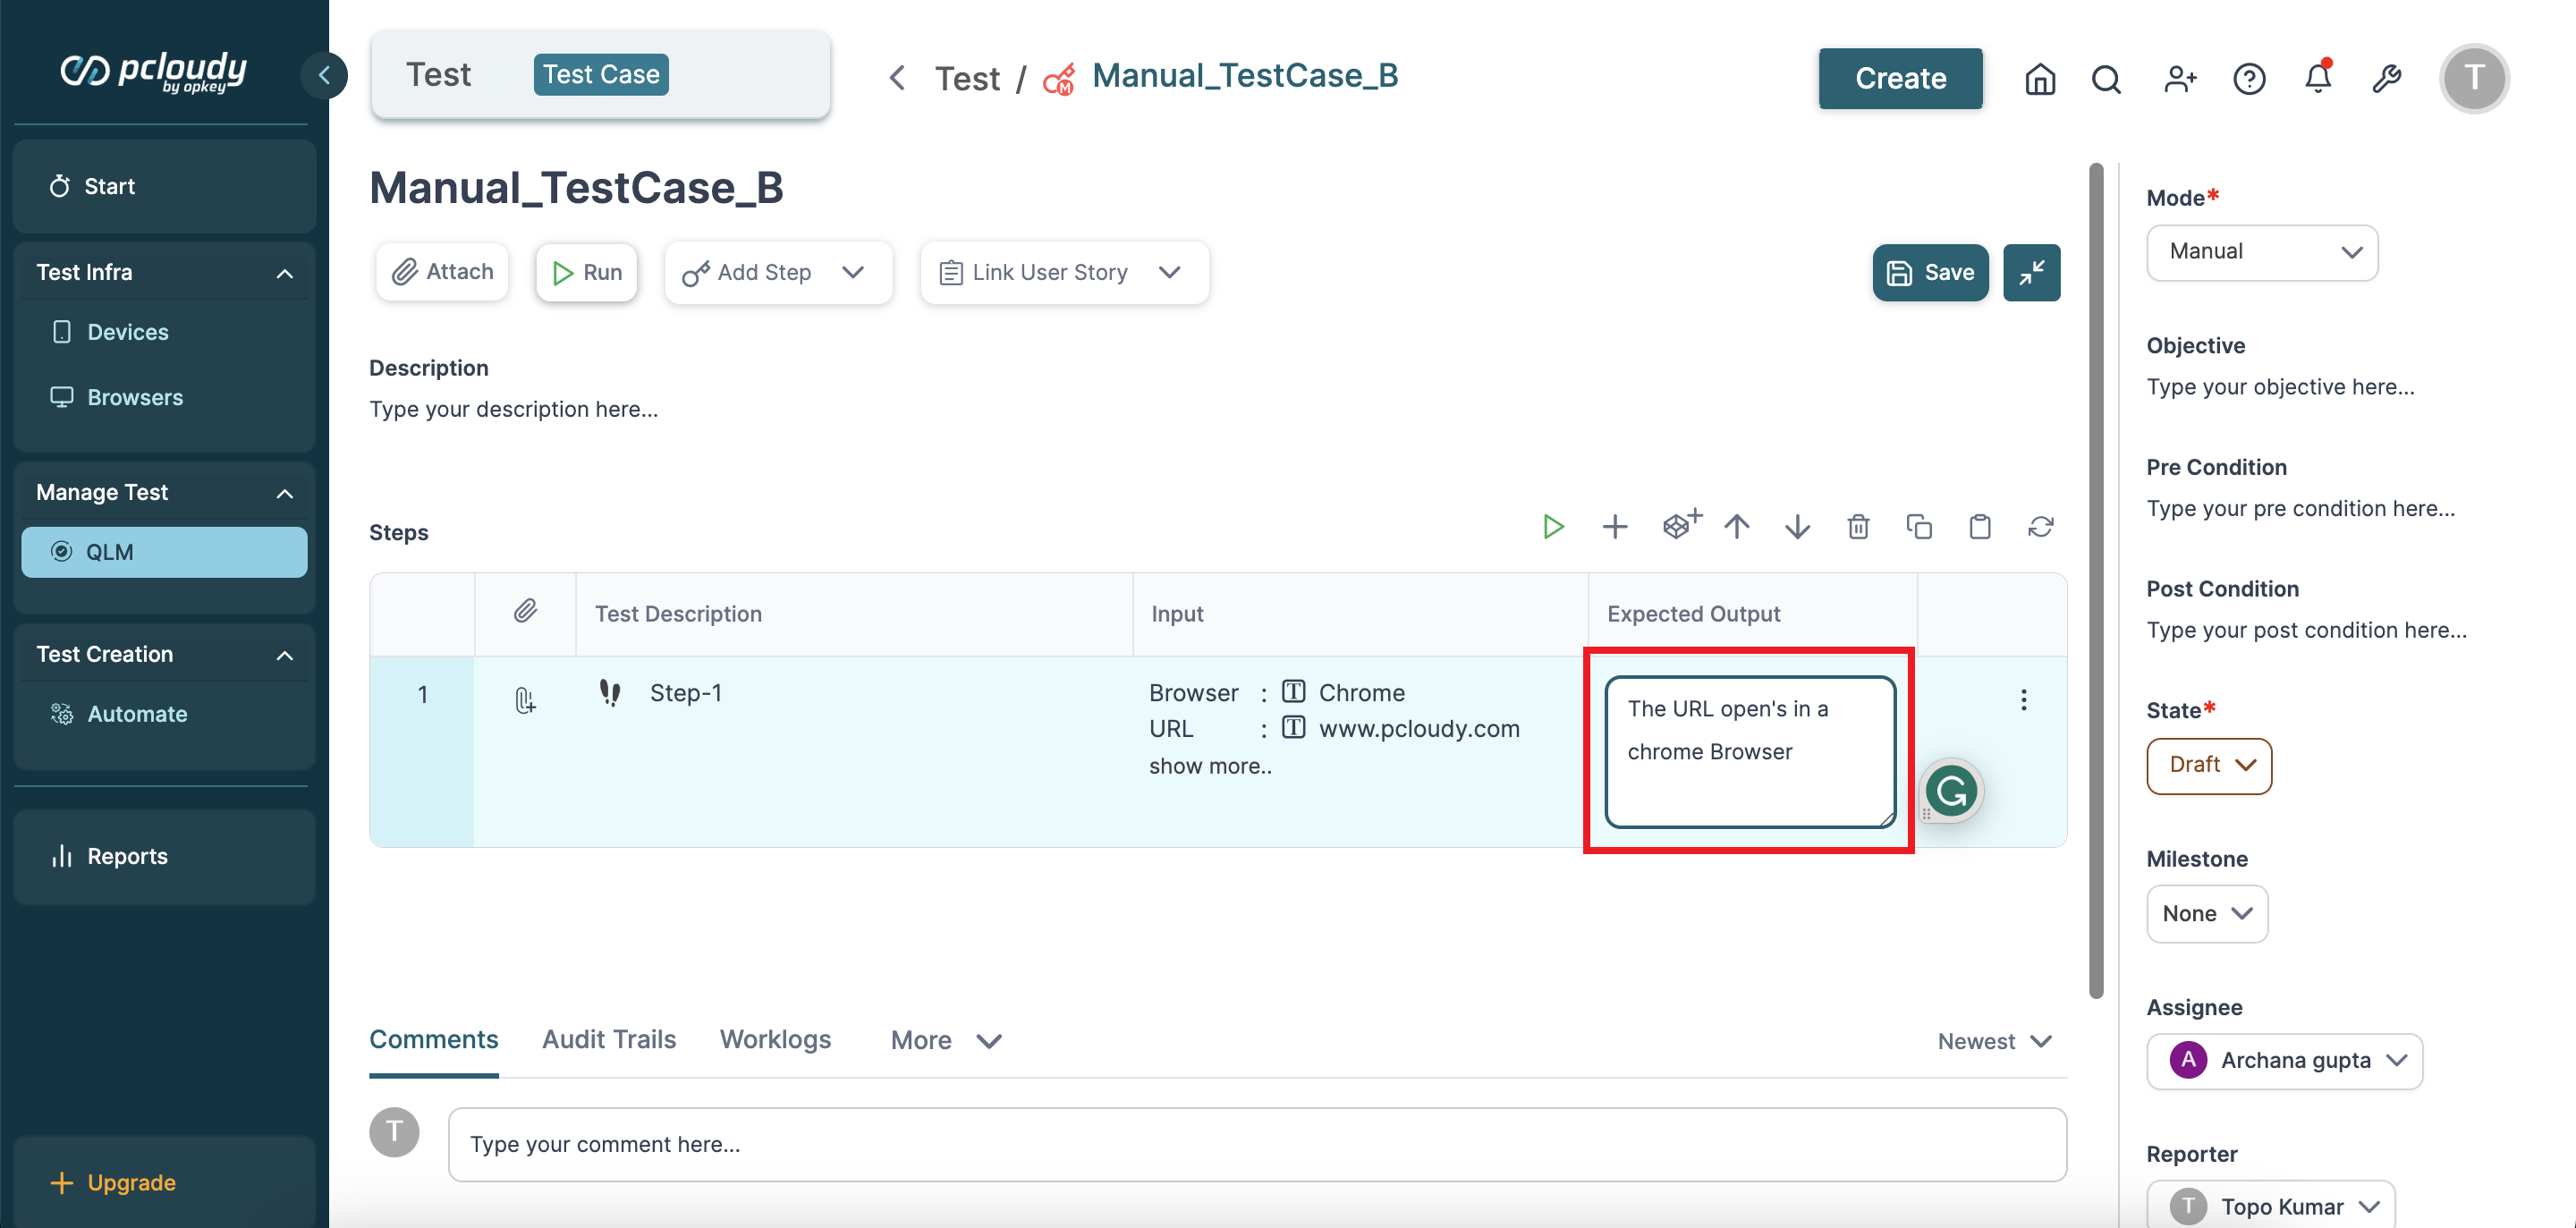
Close the Edit data of step window. You can also add the expected output in the adjacent tab as shown below.
You can also map any existing reusable components containing repeatable steps to this test case. Click the Add Component Step icon, and search the component as shown below.

Here, we are adding a manual reusable component containing steps to sign-in on the URL.
Type the name of the reusable component and click on the search result to add it to the test case. Your manual test case is ready.

You can further upload attachments, like images, spreadsheets, videos, etc. by clicking the Attach button in the top panel. You can also add attachments to test steps by clicking the Upload Attachment icon available in the test step.

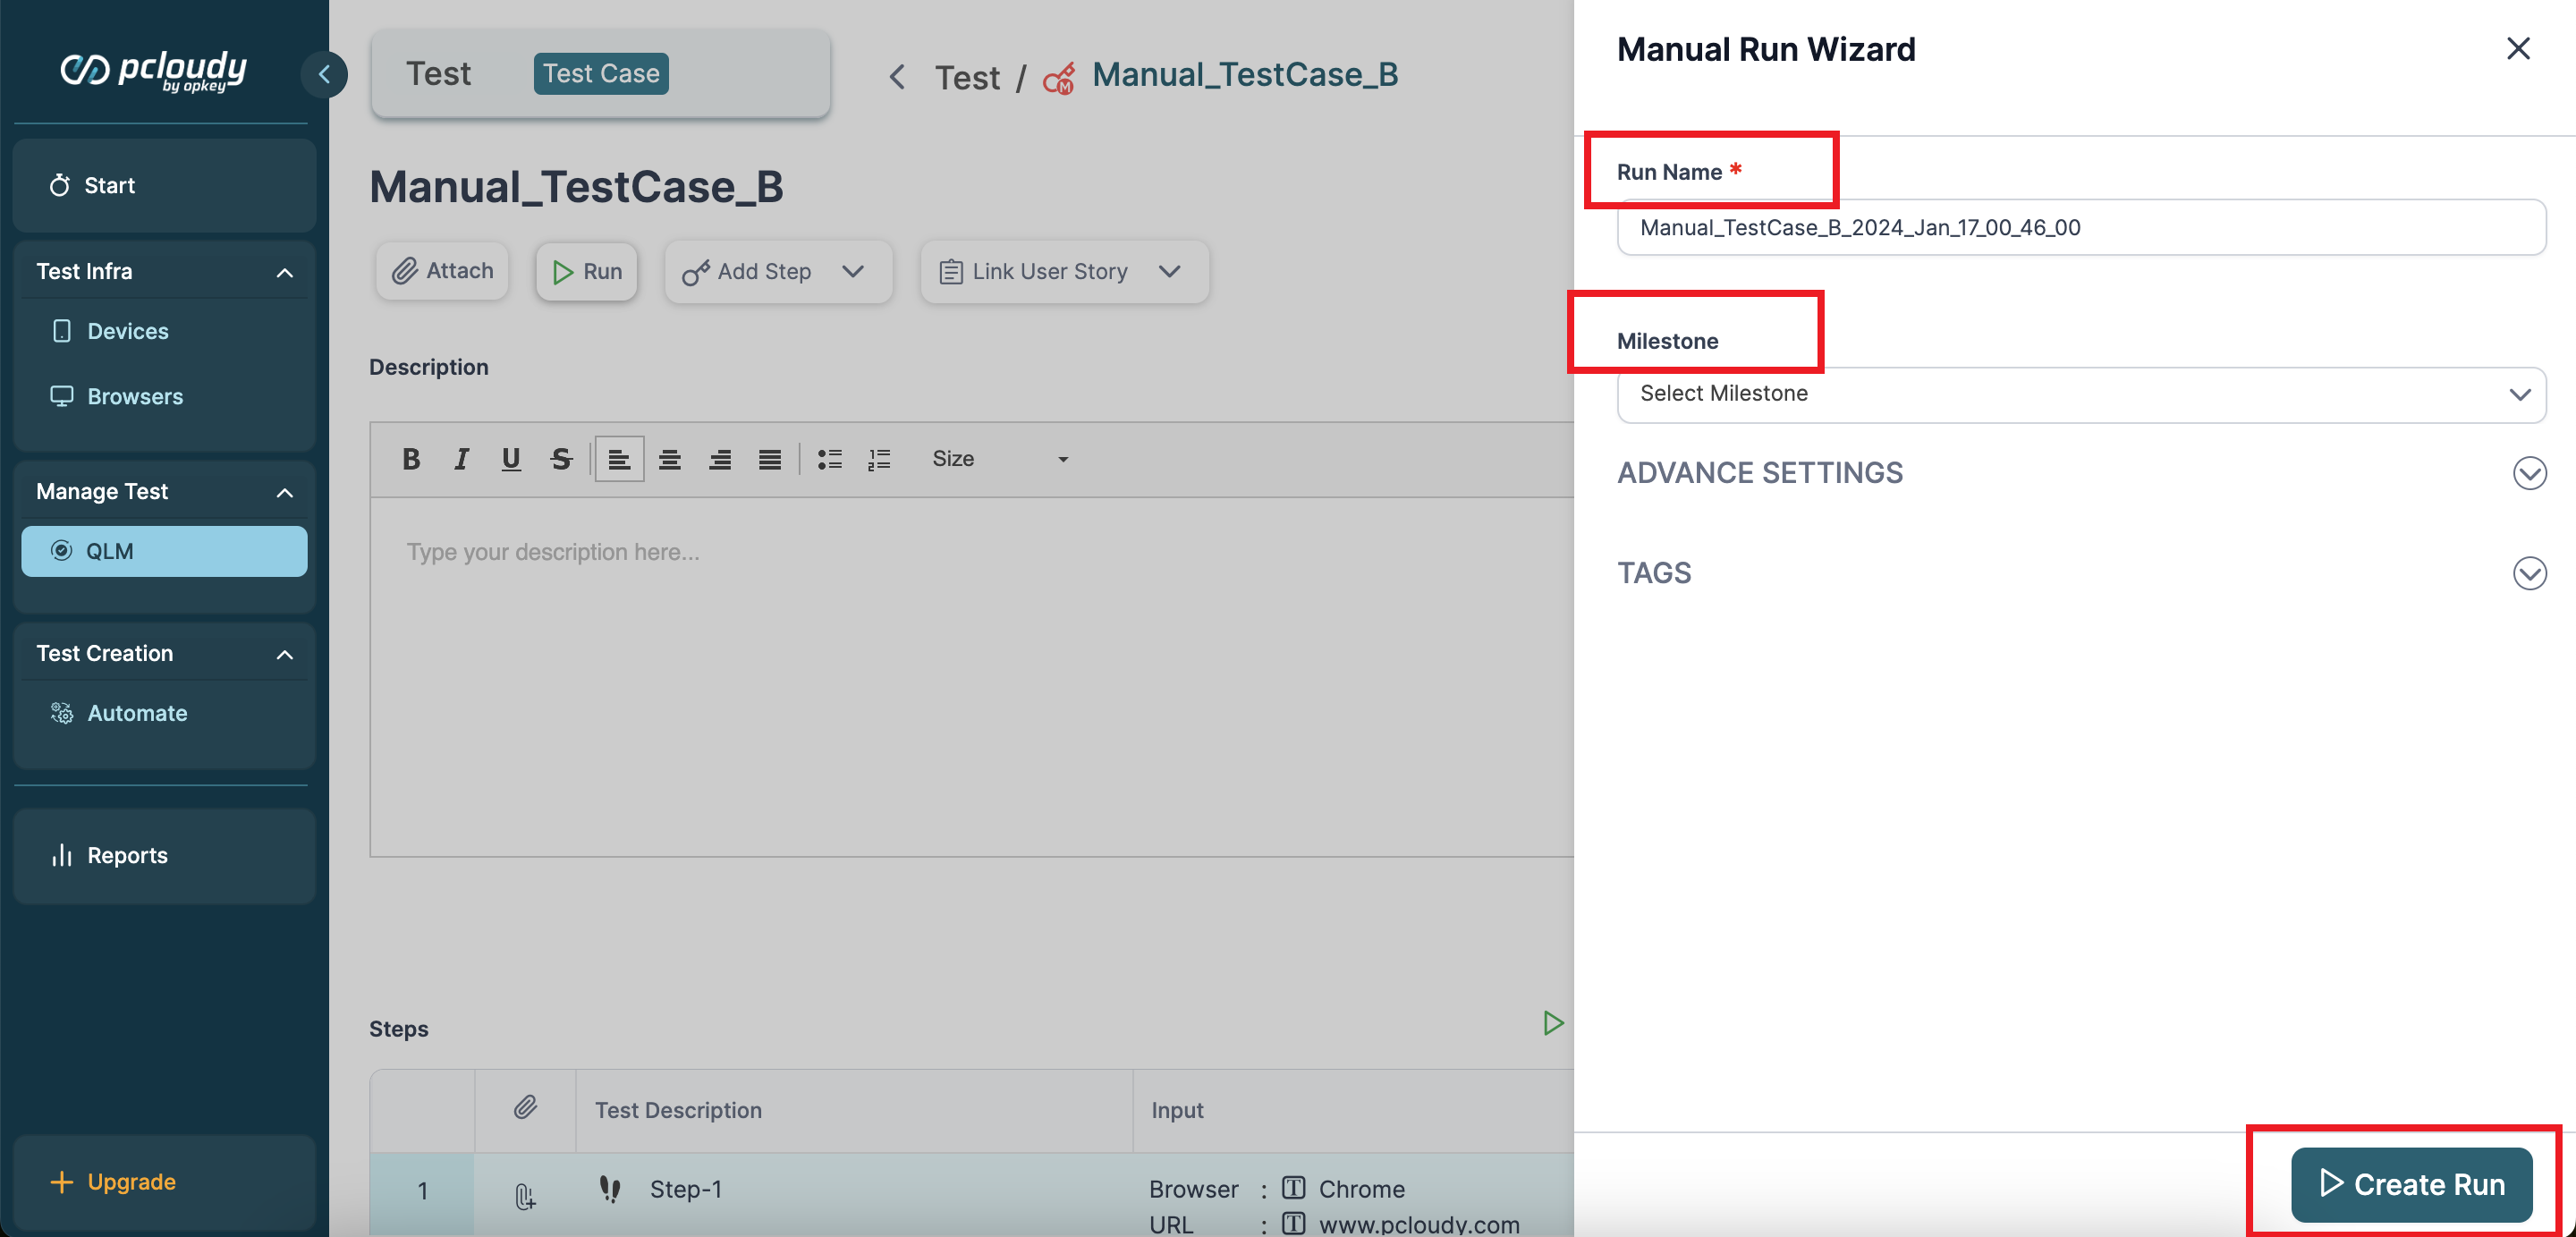
Once done, save all the steps. Now, you can run your test case. To start the execution of the Manual Test Case, click the Run button in the top panel.

A Manual Run Wizard page opens on the right. Enter a run name, select a milestone for which you are creating this manual test, enter a build name, and click Create Run.
Additional Features on the Test Case Page
Similar to an automated test case, you can link a user story, ticket, or test suite with your manual test case to link all the related processes associated with the testing of a feature. Project managers, testers, or reviewers can also add comments or see audit trails of the test case.


Reviewers can also change the state of the test case by selecting an option from the dropdown present in the right panel of the test case page.

You can add additional sections test case documents, integration mapping, or backup data by selecting from the More dropdown.


